Project creation and management of members and organizations are reserved for Internal team members. Client and vendor members will not have the permissions for this.
Project Set Up Help Highlights
Add Organizations to your Project
Add Members to your Project and Assign them Permissions
Assign a new or additional project owner
Start a New Project
The first step of setting up a new project is starting one. Click on Projects on the primary vertical menu, and then New Project. Enter a name for your project and click Create. The name of your project can be edited later, if needed, by a project owner.
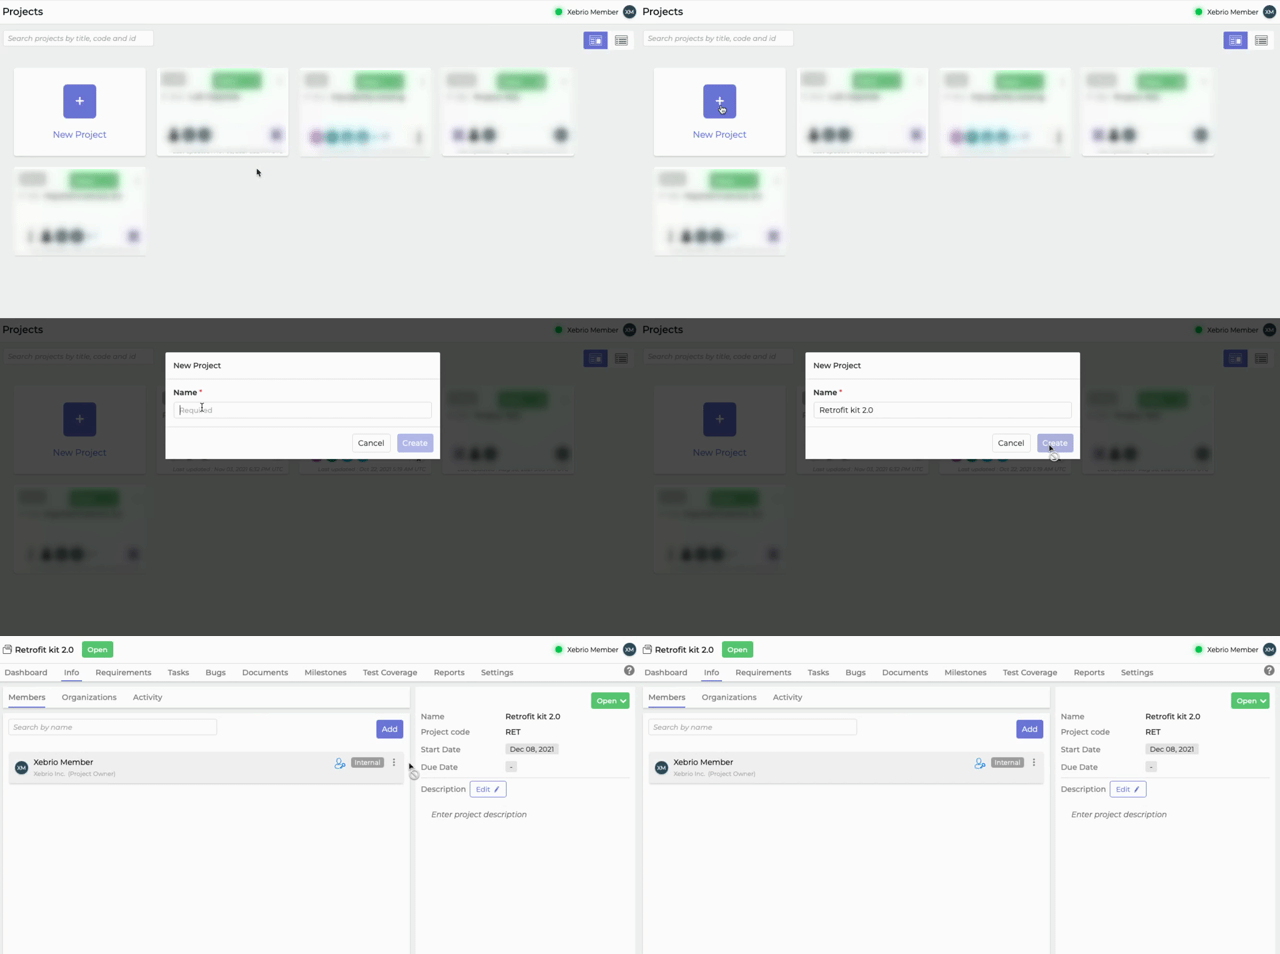
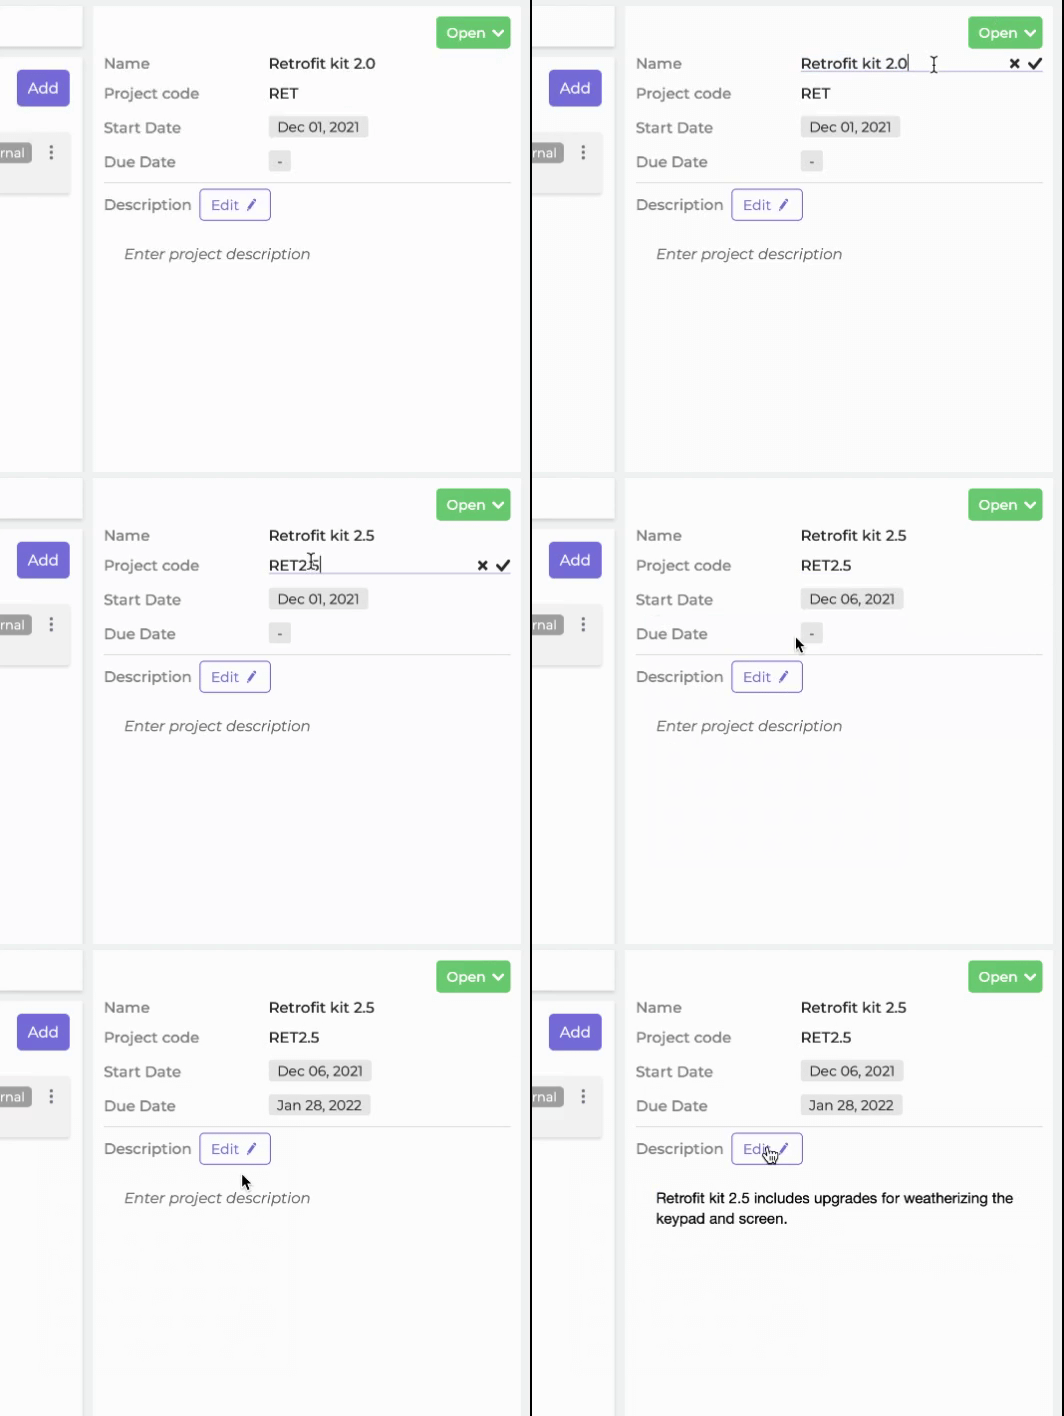
Once created, you will be directed to the project's details window. In the Info tab, you can update the details of your project on the right side. When a project is created, Xebrio will automatically generate a project code, which can be edited. Here you can also update your project start date and due date. Note that the start date will set a boundary for other start dates, such as for tasks, bugs and milestones.
To edit the project description, click Edit to collaborate between team members in real time. Click Done
to exit. Your edits are auto-saved.
Add Organizations to your Project
Organizations collaborating on your project should be added. There are three types of organizations:
Internal Company - This is the group of people belonging to your organization, that you will work with everyday.
Client Company - This is the group of people to whom you want to deliver your project. Create a client company to enable external stakeholders to collaborate and monitor the progress you're making on the project.
Vendor Company - This group provides goods & services, and are typically provided access to various parts of the project so they can perform their job.
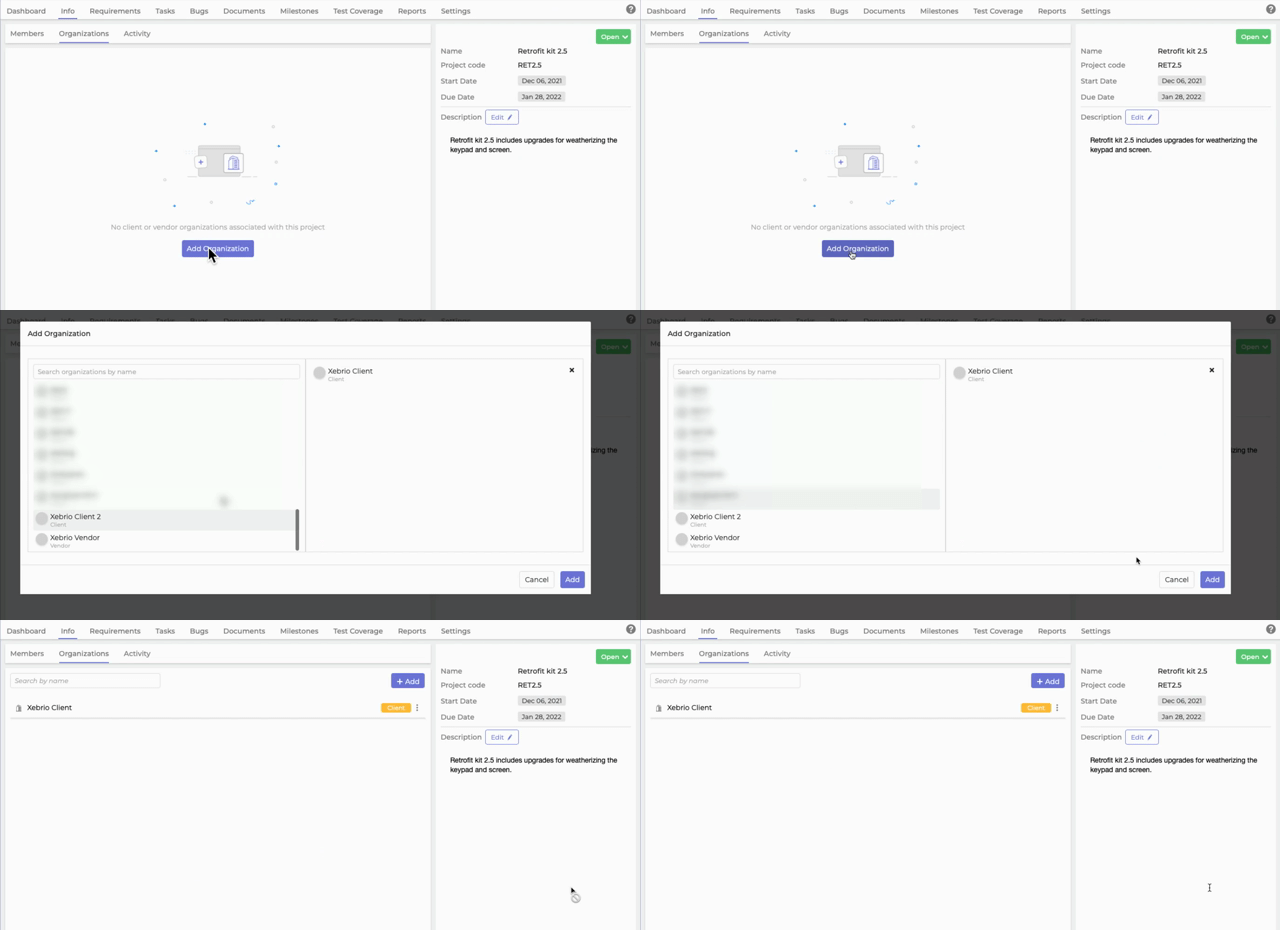
In the Info tab of a project's primary horizontal menu, click the Organizations tab in the secondary horizontal menu. Click Add Organization to add your first organization. (Once you have at least one organization added, you will see an Add button instead.) A list of available organizations will be listed in the right side of the pop-up. Click on them to add them to select, then click Add. Once an organization is added, team members of that Organization can then be added as Members to the project.
Only project owners can add organizations to a project.
If an organization is not shown in the list of available organizations to add, they may first need to be added to Xebrio. Please contact your admin if this is the case.
Add Members to your Project and Assign them Permissions
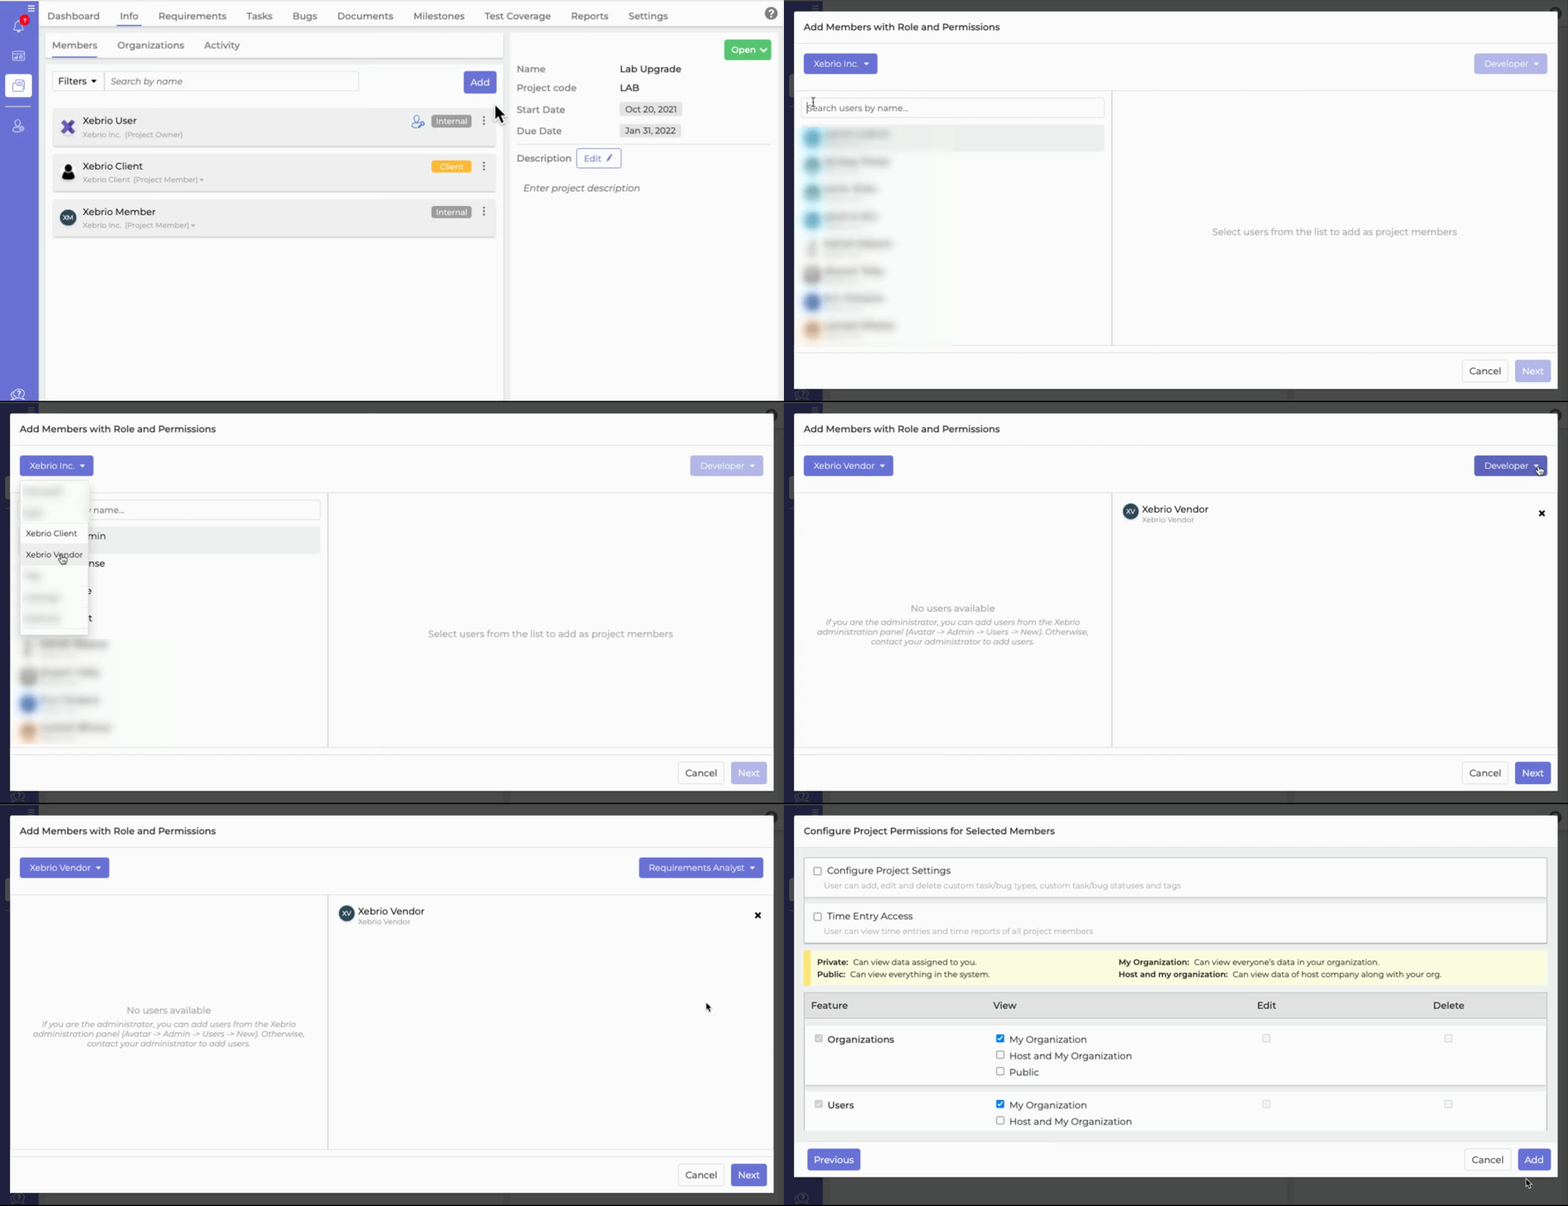
Members can be added from the project's Members tab, which is under the Info tab of the project's primary horizontal menu. Click on the Add button, and a pop up will appear.
 Add members
Follow the steps below when adding a member.
- Choose the organization - In the pop-up, first choose the correct organization for which the user is a part of in the drop down menu located on the top right corner of the pop-up. Available members from that organization will appear in the list. If the organization does not appear in the list, then the organization must be added to the project first.
- Select the user - Available users to add will appear for the chosen organization. Click on the user to select them. Note that if the member does not show in the list, they may already be added to the project, or a Xebrio admin will need to add them as Xebrio user first.
- Assign the member a project role - For the select user, choose a project role from the drop down in the top left corner of the pop-up. If there are multiple members selected, then the selected role will apply to all those members. Note that the role of Project Owner is reserved for members of internal organizations.
- Click Next to assign project permissions for the selected users.
Assign project permissions
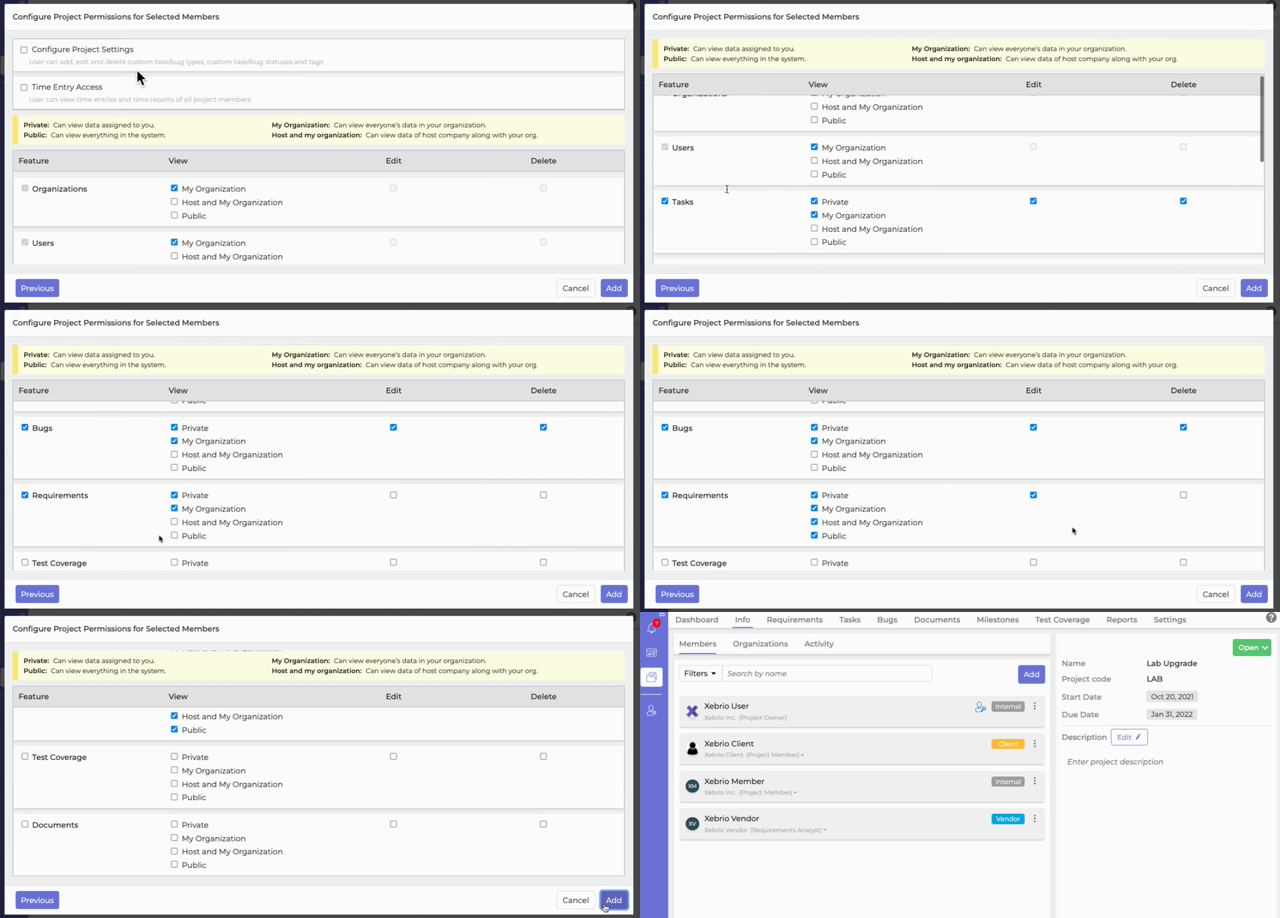
Project permissions can be customized for each member, and these permissions can be edited later. The following are the permissions available:
- Configure Project Settings - Selecting this box will allow the selected users to add, edit, and delete custom tasks/bug types, custom task/bug status and tags. These users will have the project Settings tab available to them.
- Time Entry Access - Selecting this box will allow the selected users to view time entries and time reports of project members. These users will have the project Time Entries tab available to them,.
Permissions for the features of Organizations, Users, Tasks, Bugs, Requirements, Test Coverage, Documents can also be customized for users. For these features, the following viewing options are available:
- Private - The user can view the data assigned to them
- Public - The user can view everything in the system
- My Organization - The user can view the data for everyone in their organization
- Host and my organization - The user can view the data from the host company and from everyone in their organization
Additionally, you can assign Edit and Delete permissions for each of the features as well.
Permissions can always be updated later.
Delete a Project
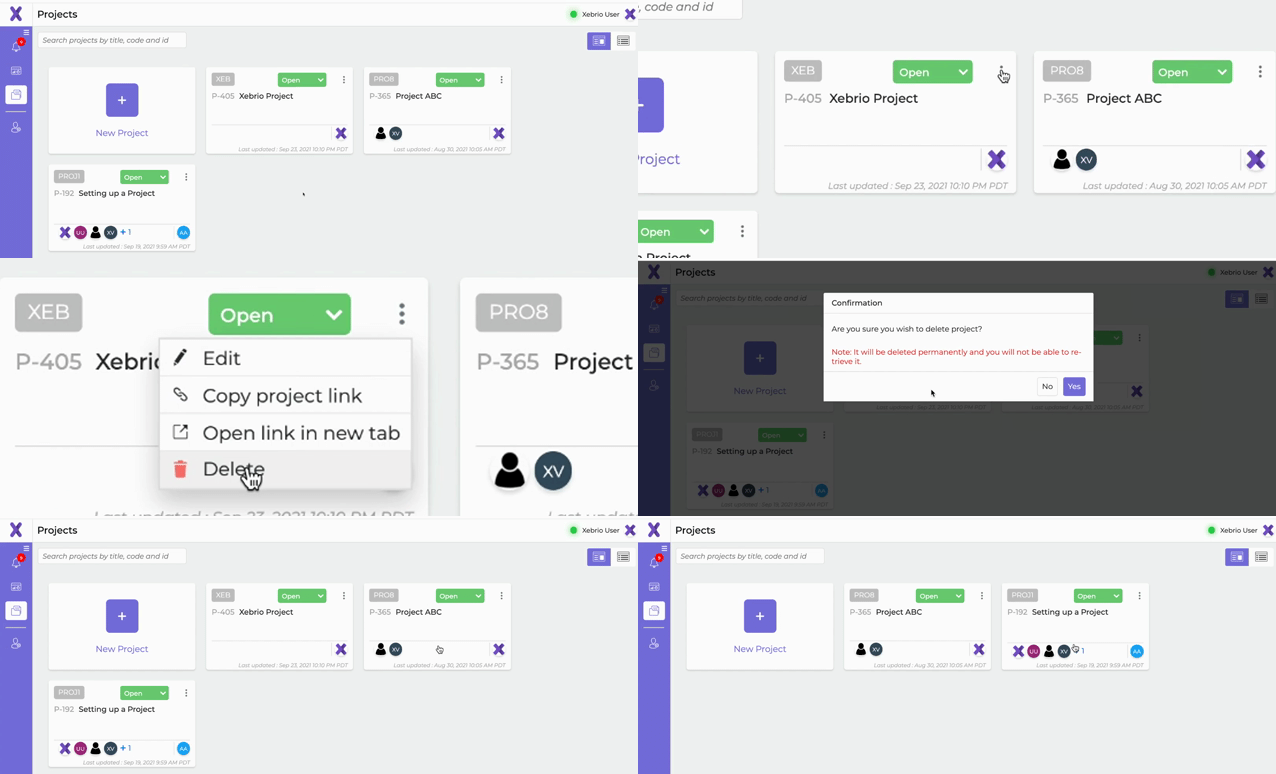
Project owners or project members who are assigned permissions to delete the base entity can delete projects. Projects that contain tasks, requirements, milestones, bugs, discussions, assets, or time entries cannot be deleted.
Click on ‘Projects ’ on the left sidebar. You will be able to view a card of each project. Click on
on the top-right corner of the card of the project that you wish to delete. Select the option
Delete and confirm the action.
Assign a new or additional project owner
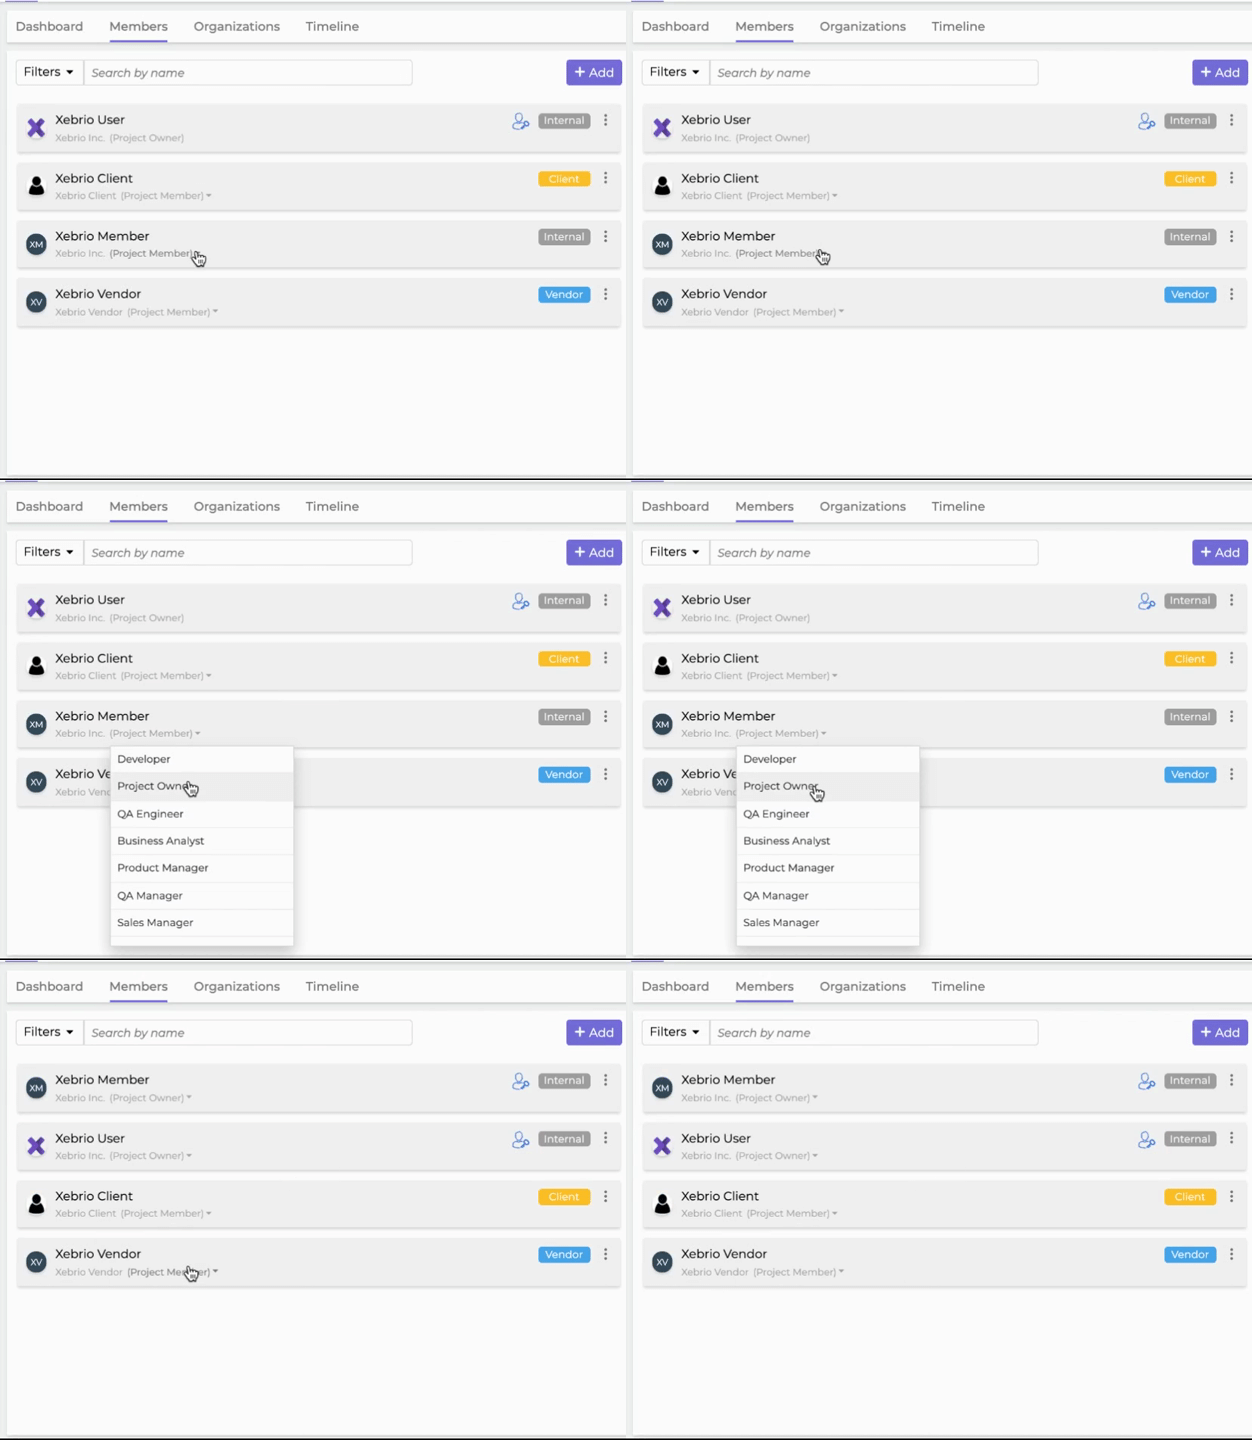
There may be multiple project owners, and current project owners and Xebrio admins can assign this role to other project owners. To do this, click on the Info tab in the project details window and navigate to the Members tab. Under each project member name is their project role, which can be clicked to expand a drop down of available roles. Click on Project Owner from the drop down to assign a user this role. Note that project ownership is reserved for users of internal organizations only.
If the current project owner needs to be removed from the project or needs to be deactivated from Xebrio, there must be at least one other project owner assigned to the project before the current project owner can be removed or deactivated.
Comments
Please sign in to leave a comment.