A build is an artifact of your project or product that can be verified for completeness, and ultimately released to your customers.
PERMISSIONS: Users will need permissions in the Test Coverage module to use the Builds feature. The ability to view and use the features in this article will depend on a user's permission settings. Project owners manage the permissions for project members.
Build Details window
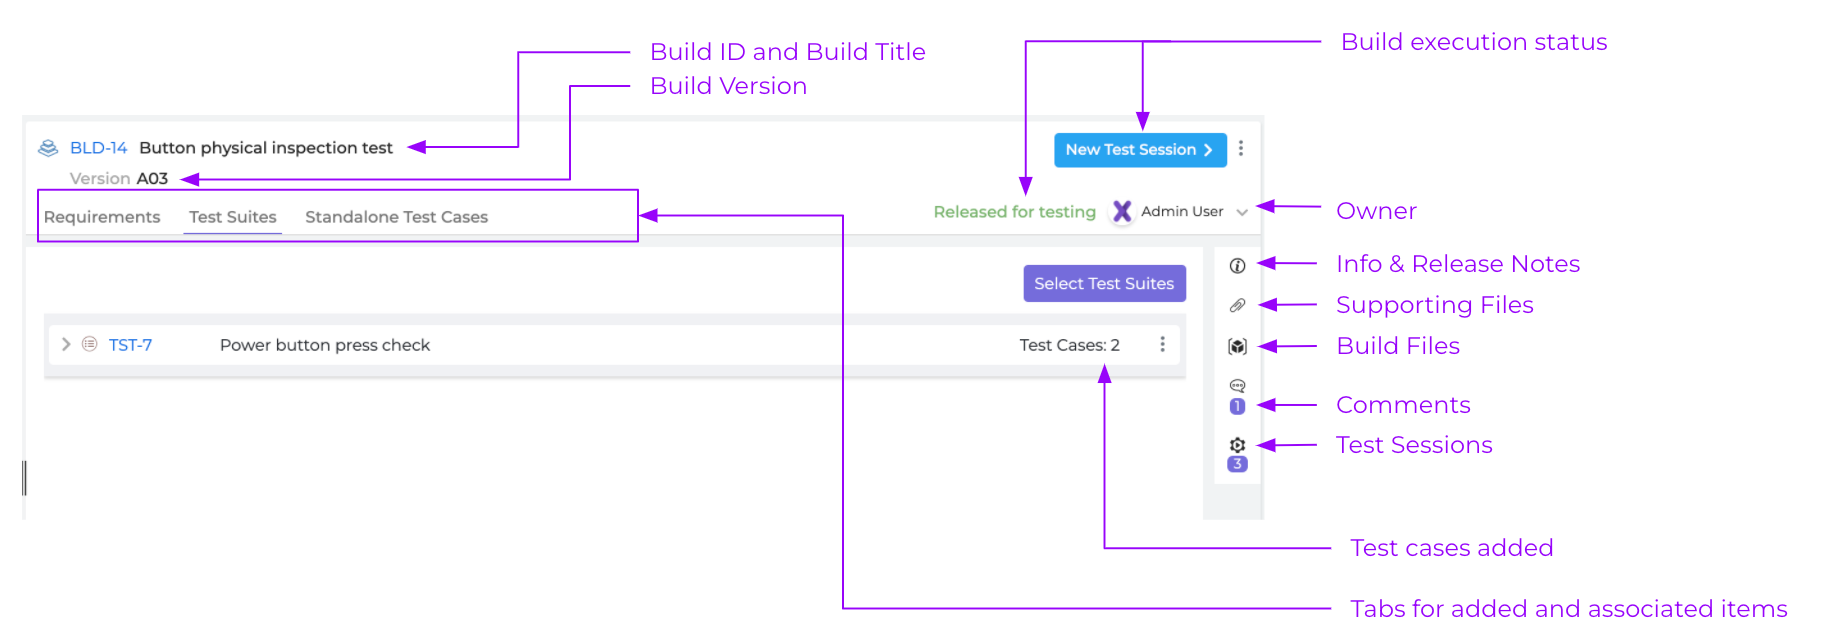
Below is an overview of the build details window. Depending on the settings of a user's project permissions, they may be able to view all project builds or just a subset of them.
Create New Build
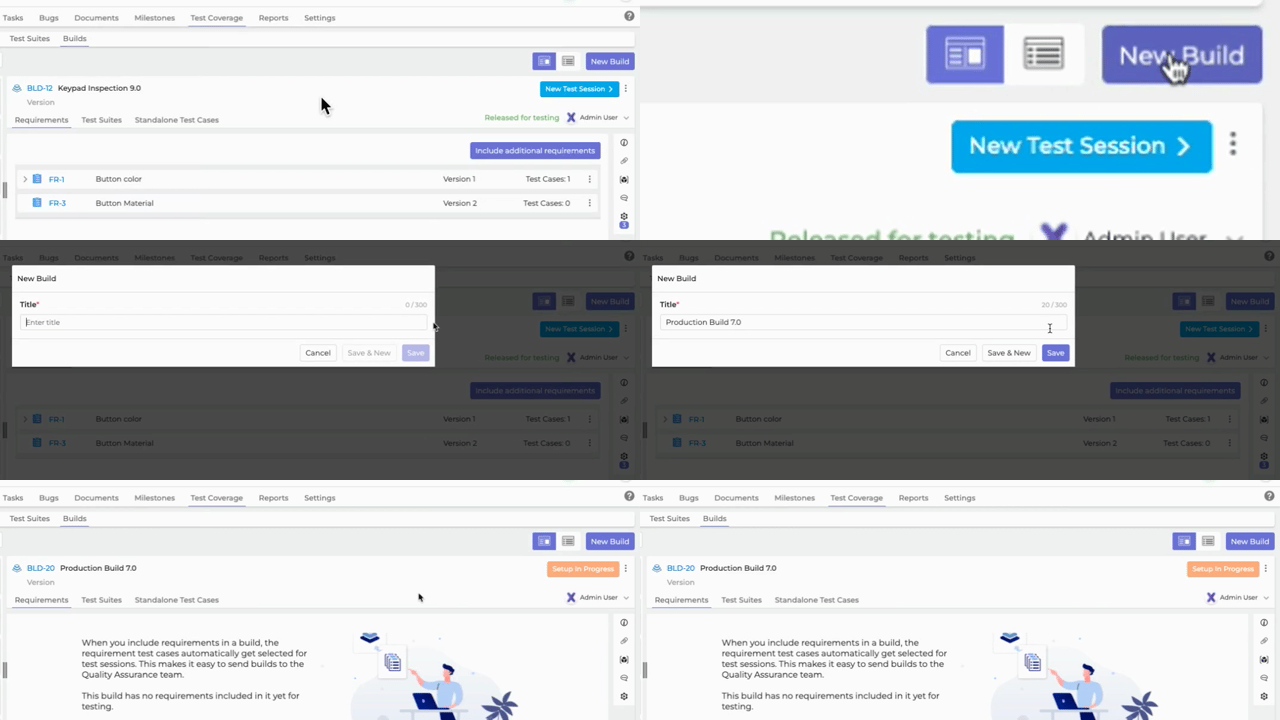
To create a new build, click the New Build button and a pop-up will appear to add a title. Enter a title for the build and press return/enter or click on the Save button. The initial status when a build is created is Setup In Progress.
Build ID
The build ID is generated by Xebrio in the order of creation. This cannot be edited. An example of a build ID is BLD-1.
Build Title
The build name can be edited at any time. Hover the mouse over the build title and click the edit button when it appears. Edit the title and click
to save, or click
or outside the title edit area to cancel editing.

Build Version
The build version can be edited at any time. Hover the mouse over the version and click the edit button when it appears. Edit the version and click
to save, or click
or outside the title edit area to cancel editing.

Owner
The creator of the build is by default the build owner. The owner can be changed at any time by clicking on the next to the current owner name to expand a drop down. Select the desired name to change the owner. Note that if the desired user does not appear in the dropdown, please ensure they are added to the project first. Depending on the settings of your project permissions, you may be able to see all project members or just a subset of them.

Build Info & Release Notes
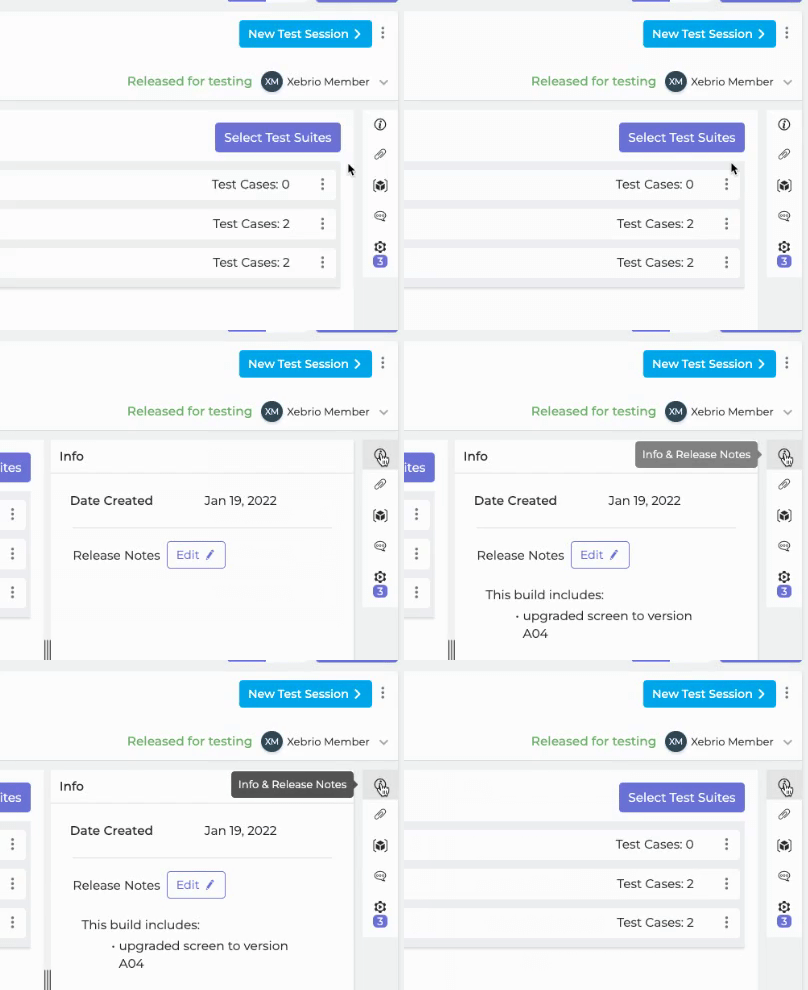
The info icon, located on the right side vertical menu, shows the date the build was created and a place to add release notes to the build. To add release notes to a build, click the info button on the right side vertical menu to expand the Info column. Click Edit
to start the real time collaborative editing mode. Multiple team members can edit the release notes simultaneously, and the edits are auto-saved. Click Done
to exit collaborative editing.
Supporting Files (Add, Download, or Delete)
Supporting files can be added to the build at any time. Click on the supporting files icon in the right side vertical menu. The area will expand where you can drag and drop files, or browse your computer for files to attach. If there is a purple numbered box below the supporting files
icon, that indicates the number of attachments already present.
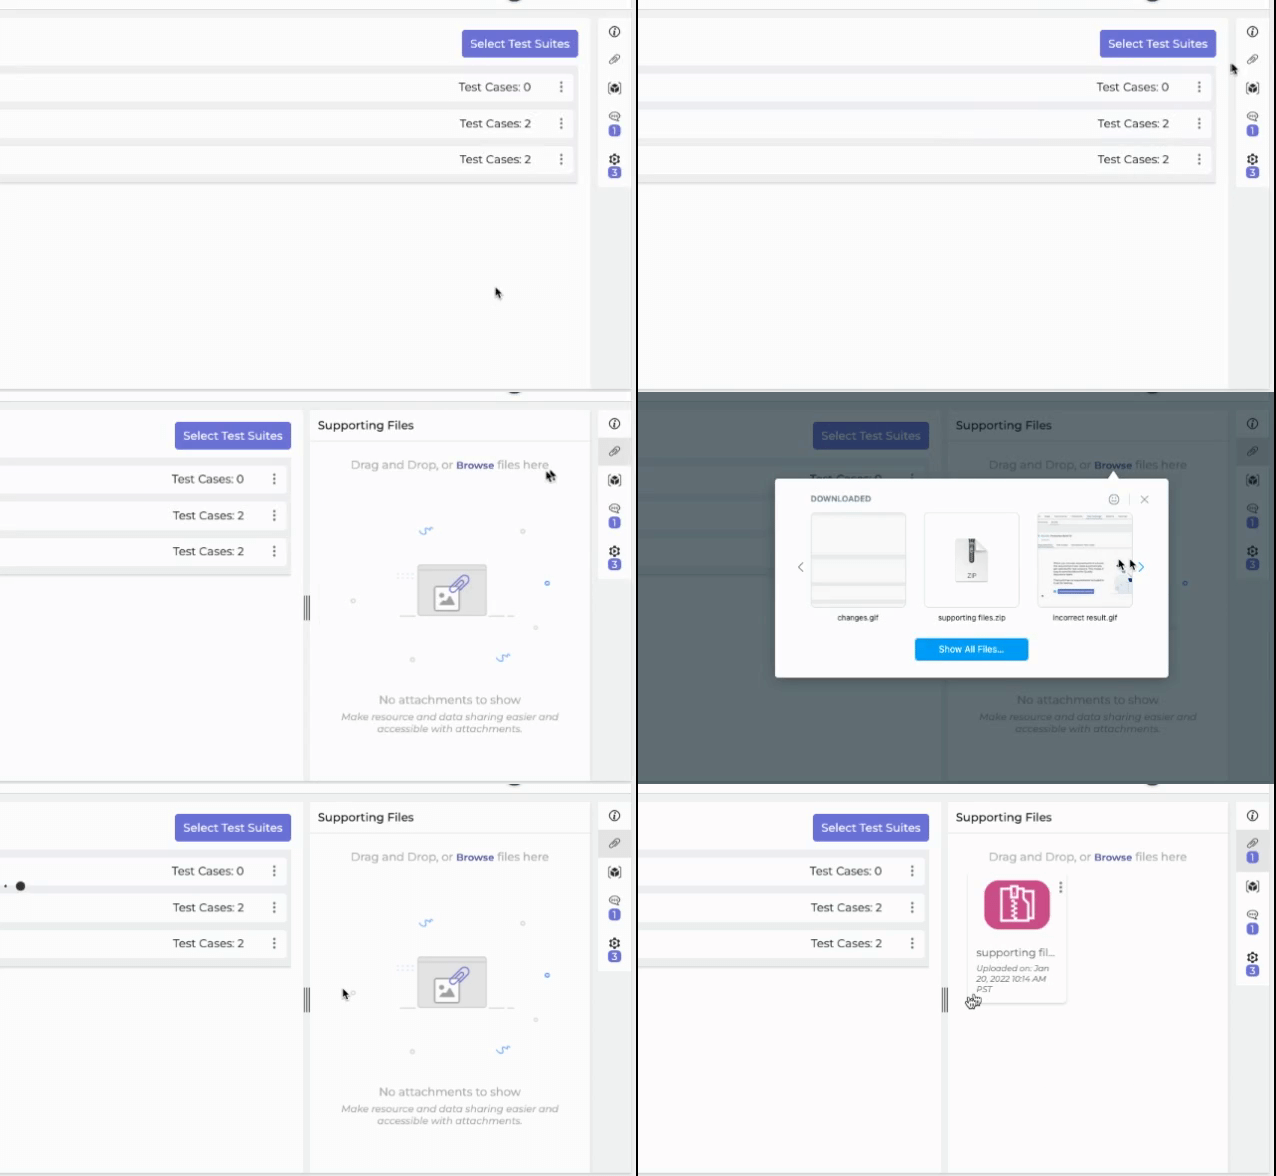
To download a supporting file, click on the vertical menu of the specific file. From the drop down, choose
Download.
To delete a supporting file, click on the the vertical menu of the specific file. From the drop down, choose
Delete and confirm your choice. If you do not have this option, your permission settings may not allow you to delete files.
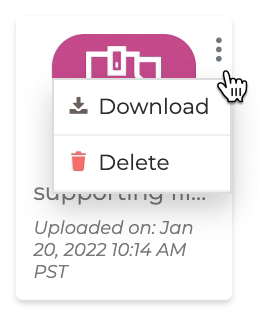
Build Files (Add, Download, or Delete)
Build files can be added to a build. Build artifacts are files produced by a build including distribution packages, WAR files, etc. While configuring a build, you specify the artifacts of your build.
Note that artifacts can not be modified or deleted once the build is released for testing.
To add a build file, click on the build artifact icon on the right side vertical menu. Browse for the file or drag and drop into the specified area to attach a file. If there is a purple numbered box below the build artifact
icon, that indicates the number of files already attached.
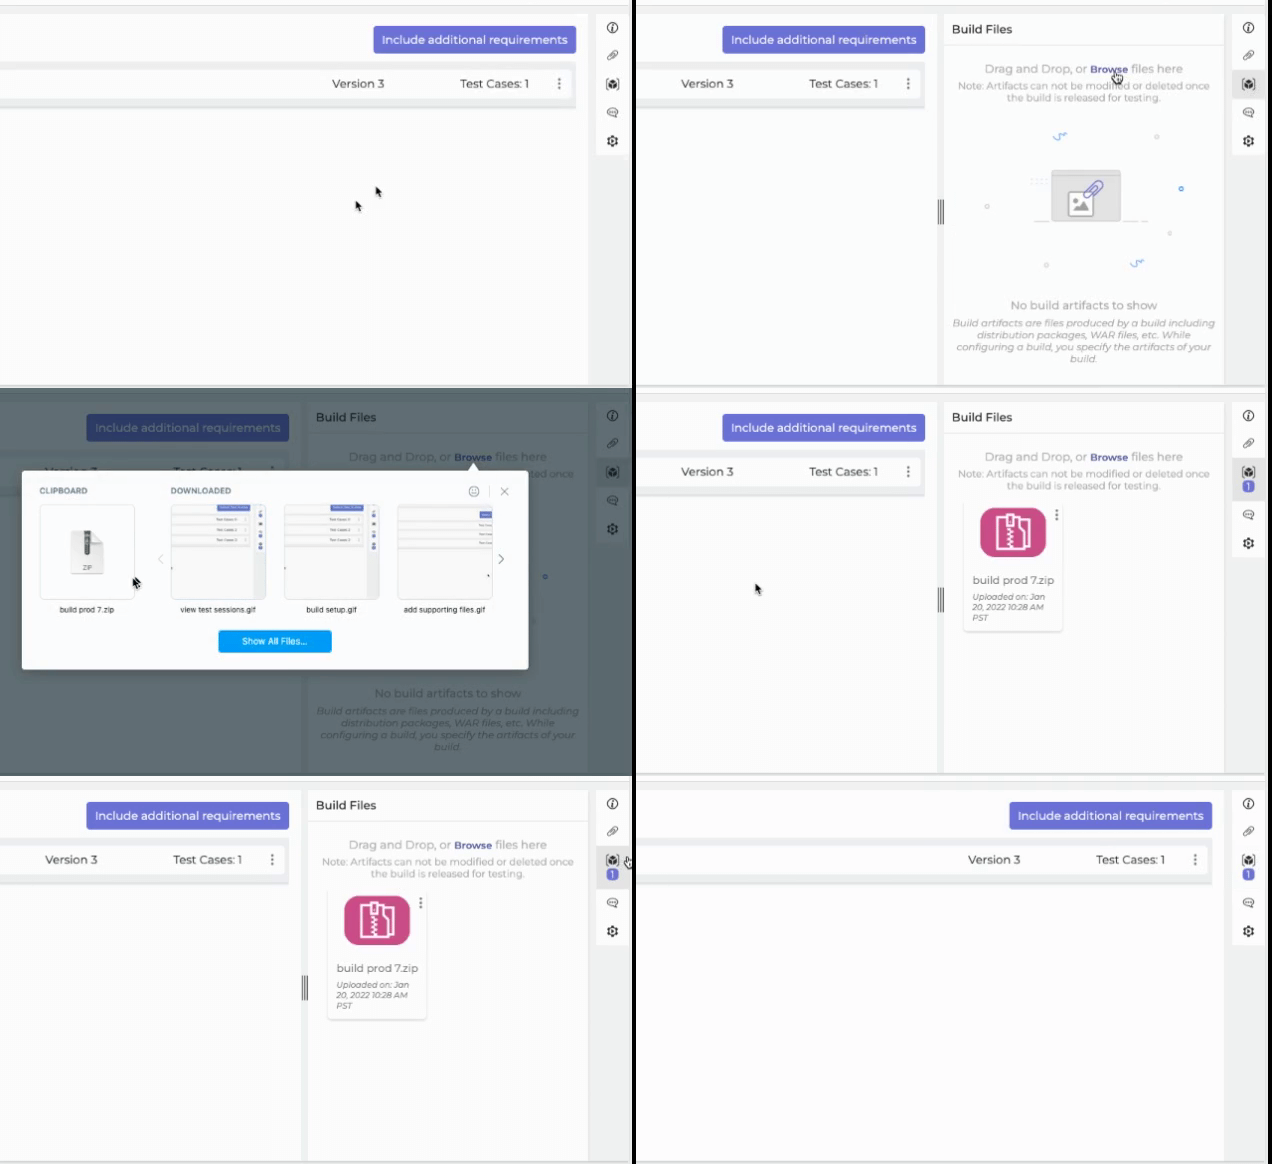
To download a build file, click on the vertical menu of the specific file. From the drop down, choose
Download.
To delete a build file, click on the the vertical menu of the specific file. From the drop down, choose
Delete. Once a build has been released for testing, build files can not be deleted. If you do not have an option to delete, your permission settings may not allow you to delete files.
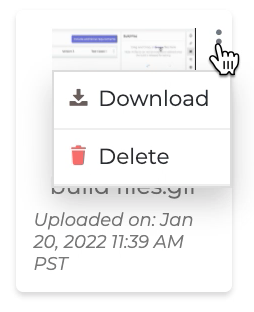
Build artifact options if not released for testing
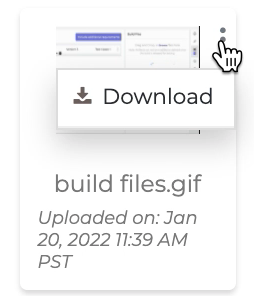
Build artifact option after build is released for testing
Comments
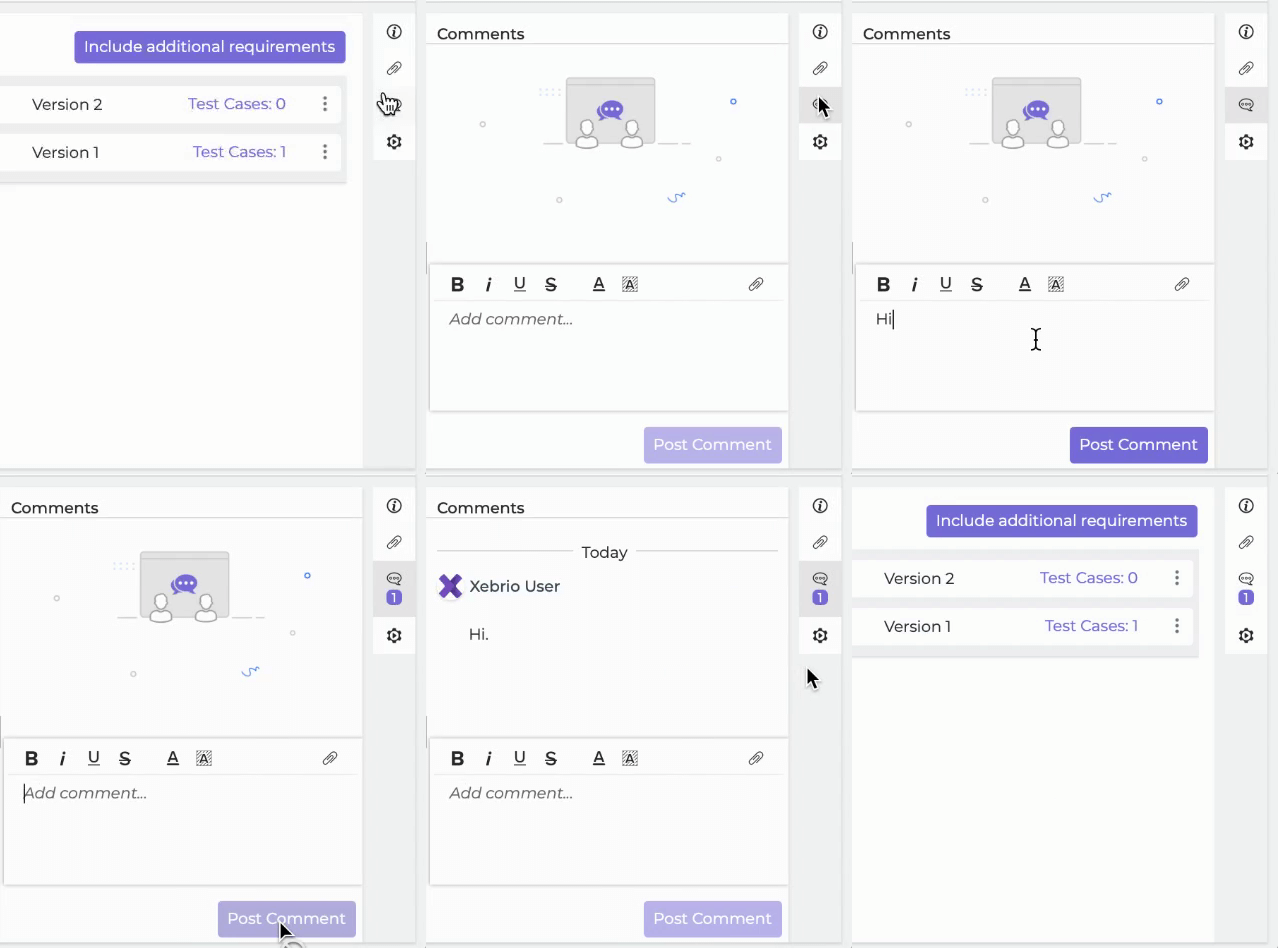
Comments can be made to the build at any time. Click on the comments icon in the right side vertical menu. Enter your comments in the box and click Post Comment to submit. If there is a purpled numbered box below the comments
icon, that indicates the number of comments already made.
View Test Sessions
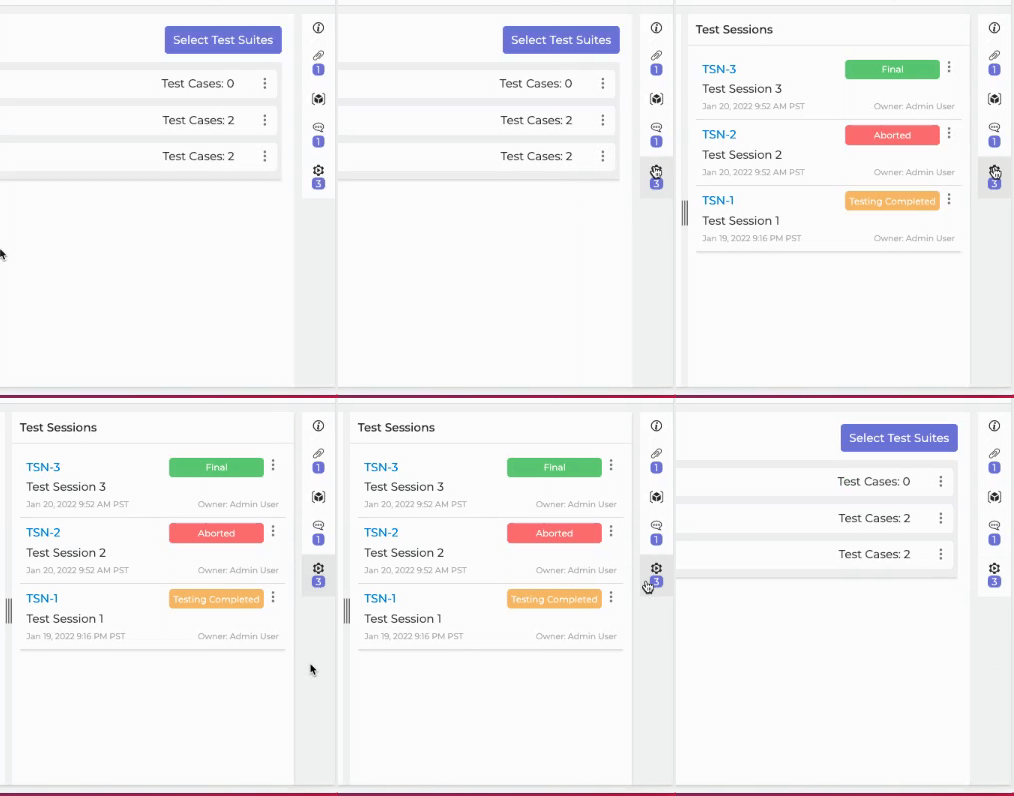
You can view all the test sessions for the build by clicking on the test sessions icon in the right side vertical menu. If there is a purple numbered box below the test sessions
icon, that indicates the number of test sessions for the build.
Build Execution Status
This indicates the execution status of the build. The below table outlines the various statuses:
| Status | Button Image | Status description |
|
Setup in Progress (no dropdown) |
 |
- Initial status when a build has been created. - If there is no dropdown available, then no requirements, test suites or standalone test cases have been added yet. |
|
Setup in Progress (with dropdown) |
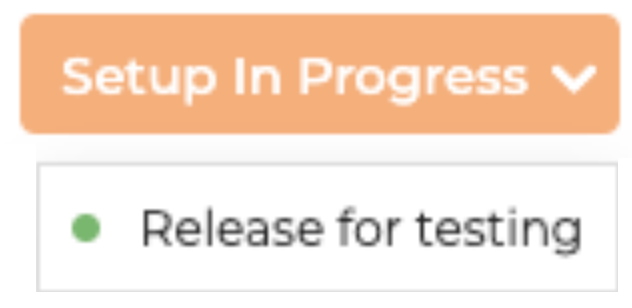 |
- When at least one requirement, test suite or standalone case is added to the build, then the build can be released for testing. - There is a dropdown option now to Release For Testing. This will allow a build to be ready for testing mode. |
|
Released for Testing (no dropdown) |
 |
- The build was released for testing, no test sessions were started, and then any and all added requirements, test suites, and standalone test cases were removed. - At least one requirement, test suite, and/or standalone test case should be added before starting a test session. |
|
Released for Testing (with dropdown)
|
 |
- The build has been released for testing, but no test sessions have started. - The Released for Testing - Click on the Released for Testing - Note that once a test session has started, the option to revert back to setup will not be available. However, additional requirements, test suites, and standalone test cases can still be added to the build for future test sessions. |
|
Start Test Session |
- This stage is the same as the above stage. - The build is ready for testing mode. No test session has been started yet, and in this stage the build can still be reverted back to setup up. - Click on the Start Test Session - When additional requirements, test suites and/or standalone test cases are added to the build, it will only be added to future test sessions. |
|
|
New Test Session
|
- There has been at least one test session started. - The build's banner will read Released for Testing. There is no longer an option to revert the build back to setup. - Clicking on the New Test Session
|
For guided introduction into test session execution, please scroll down to Test Session Execution
Adding test cases to a build
There are three tabs to which you can add test cases: Requirements, Test Suites, and Standalone Test Cases. Using each of the tabs in the build details window, you will be able to add requirements, test suites and standalone test cases to a build. For requirements, test cases associated to a requirement will be added to the build.
Depending on the settings of your project permissions, you may be able to see all project test cases or just a subset of them.
The conditions for test cases to be added are:
- Test cases, including standalone test cases, must be in Final status
- Associated requirements must be in Final status
- Versions For requirements and standalone test cases that have multiple versions, dropdown menus will be available to select the desired version for the build.
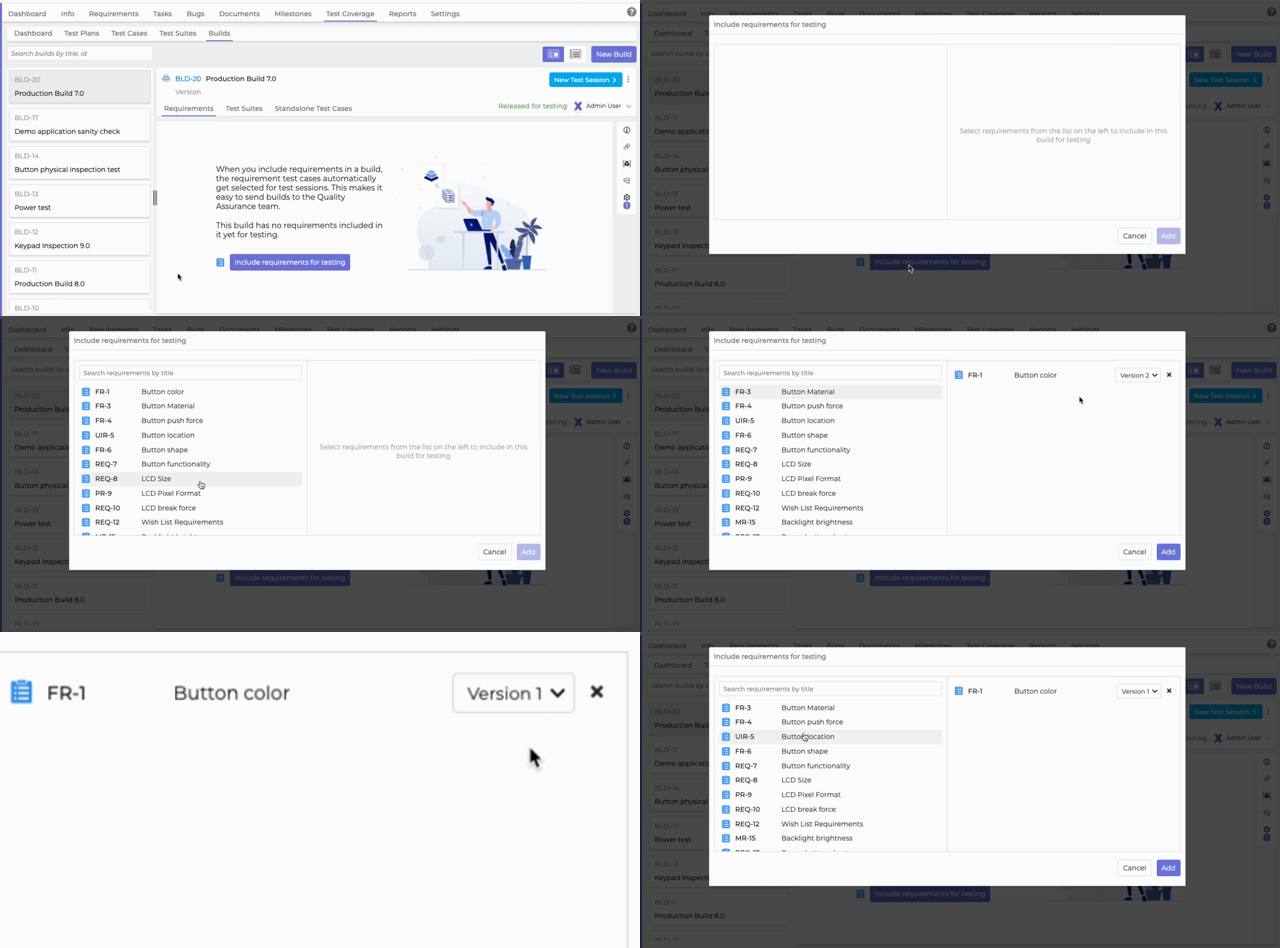
- Test cases added from requirements - Test cases associated with a requirement will be added to a build. Requirements must be in Final status for them to appear in the list of available requirements to add. Additionally, test cases associated with the requirement must be in Final status.
In the example below for FR-4, even though the requirement is added, there are 0 (zero) added test cases to the build. Either there are no associated test cases or those associated are not in Final status.
For requirements with multiple versions, dropdown menus will be available to select the desired version for the build. The version of the test case associated to the requirement will be the version chosen when it was associated to the requirement. To edit the associated test case version, this must be done in the requirement version itself and in the requirements module.
Depending on the settings of your project permissions, you may be able to see all project requirements or just a subset of them.

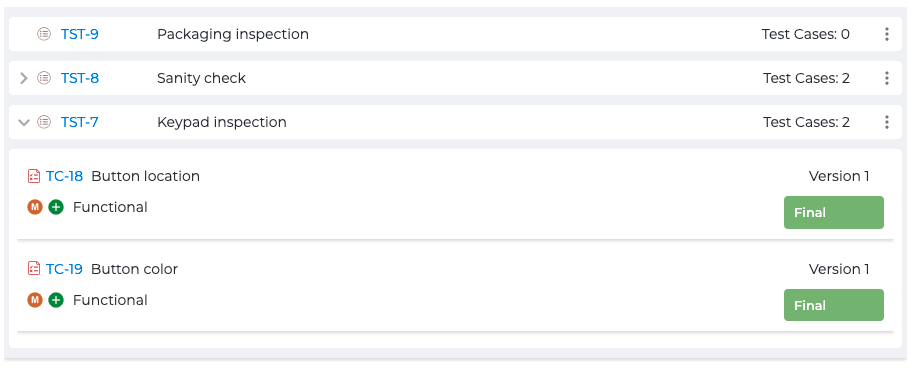
- Test cases added from Test Suites - Test cases in Final status which are included in the test suite will be added to the build. You can view the list of test cases in a test suite by clicking on the arrow
next to the test suite title to expand.
In the example below, test suite TST-9 is added to the build but there are 0 (zero) test cases in that suite. Either there are no test cases added or those added are not in final status.
The version of the test case used in the build is the version chosen when that test case was added to the test suite. To edit the version in the build, this must be done in the test suite itself.
Depending on the settings of your project permissions, you may be able to see all project test suites or just a subset of them.
- Added standalone test cases - Standalone test cases are those which are not associated with a requirement nor added to a test suite. Standalone test cases in Final status can be added to a build. The version of the test case used in the build is the version marked as current. To edit the version used in the build, this must be done in the test case.
Depending on the settings of your project permissions, you may be able to see all project test cases or just a subset of them.

Removing test cases from builds
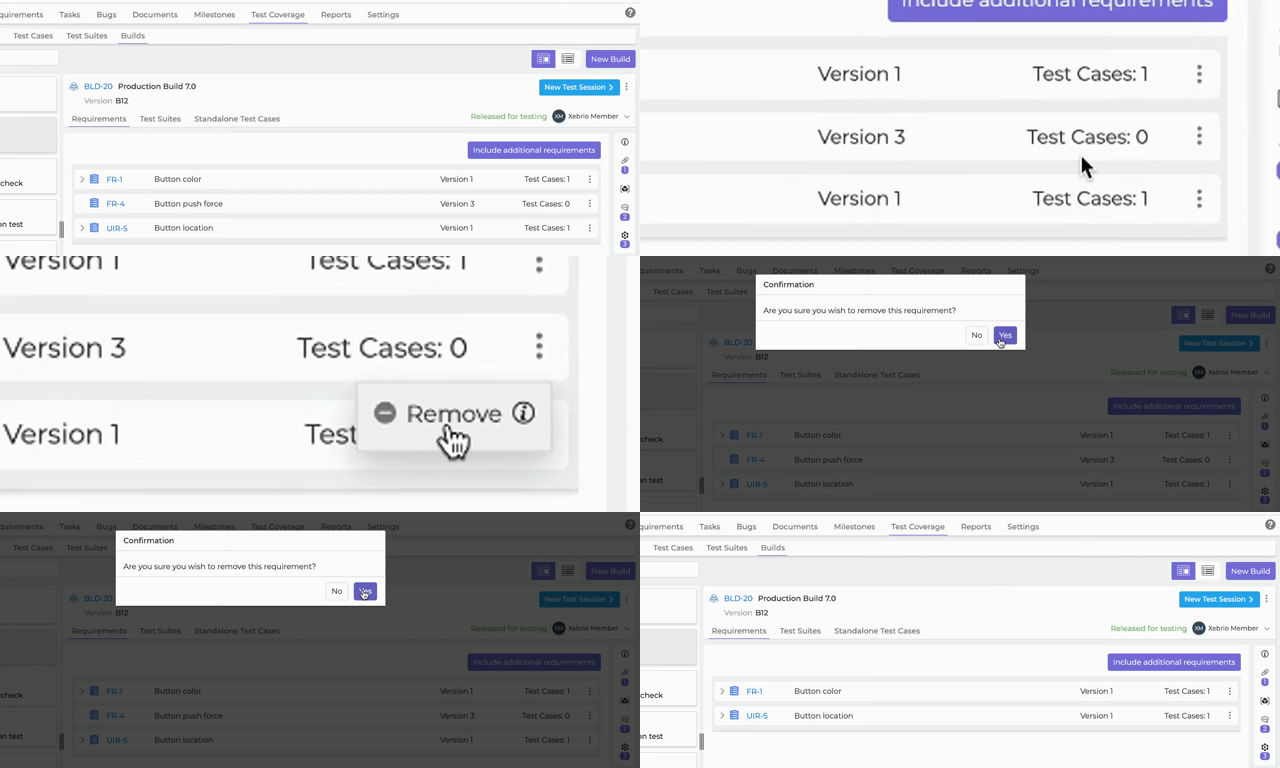
- Removing a requirement and its test cases from a build - To remove a requirement from a build, go to the details window of the specific build and then to the build's Requirements tab. Click on the vertical menu
on the left side of the specific requirement, choose
Remove and confirm your selection.
The requirement will be removed and not included in future builds. Existing test sessions will still have the test cases from the removed requirement.
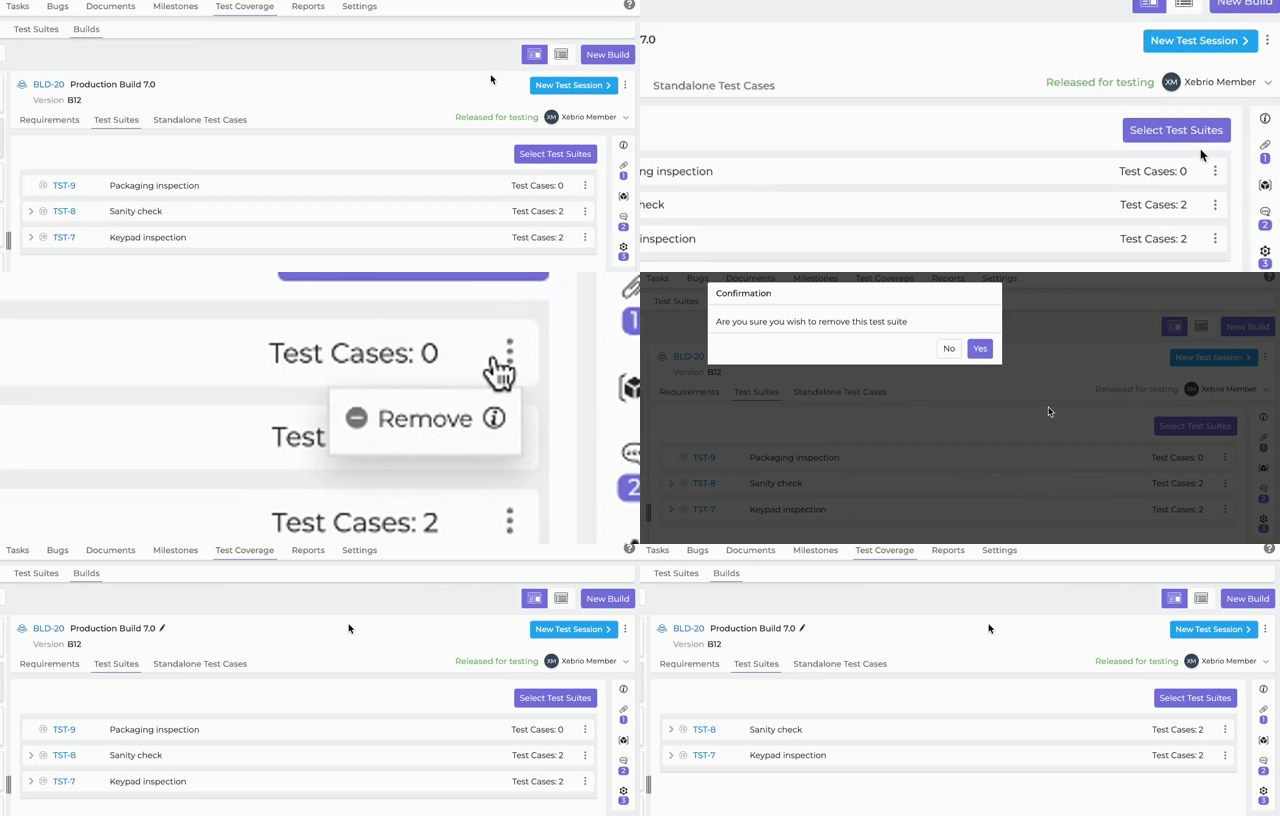
- Removing a test suite and its test cases from a build - To remove a test suite from a build, go to the details window of the specific build and then to the build's Test Suites tab. Click on the vertical menu
on the left side of the specific test suite, choose
Remove and confirm your selection.
The test suite and its test cases will be removed and not included in future builds. Existing test sessions will still have the test cases from the removed test suite.
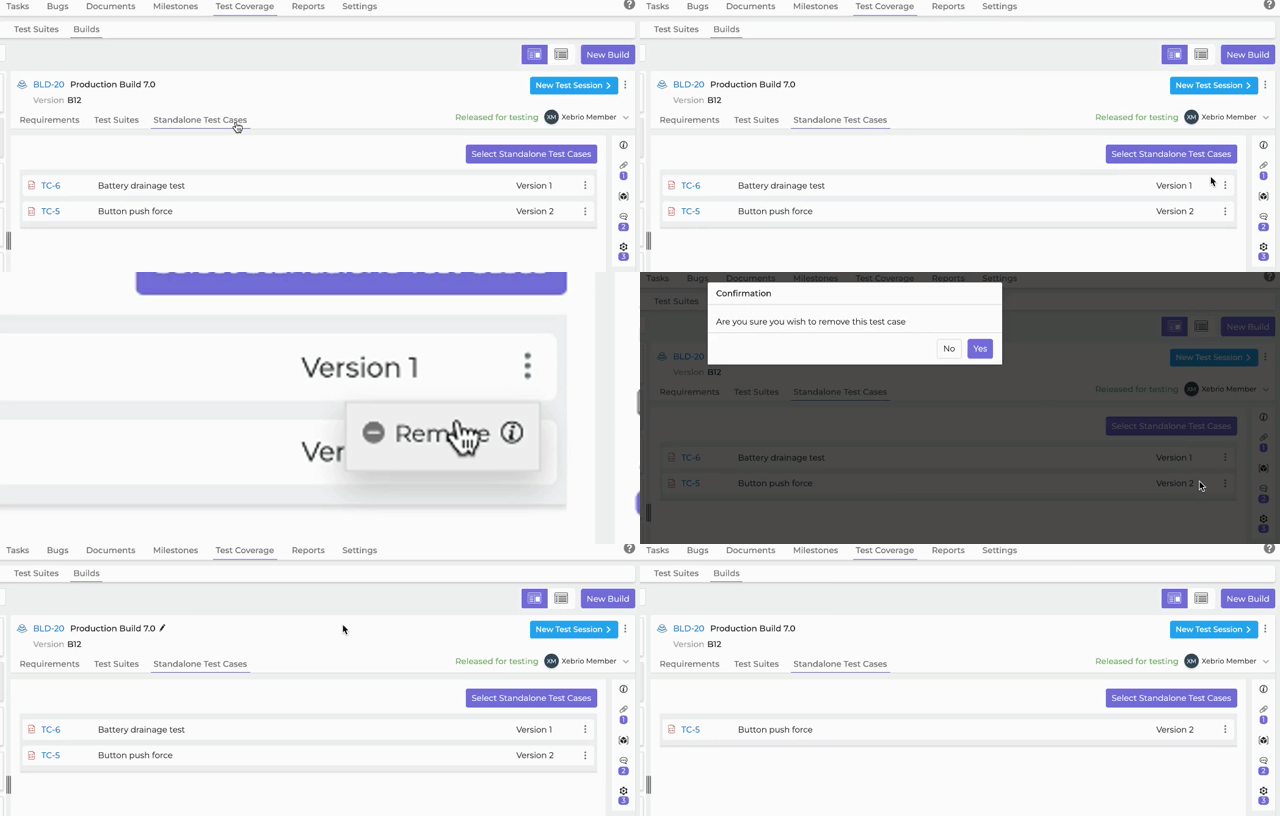
- Removing a standalone test case from a build - To remove a standalone test case from a build, go to the details window of the specific build and then to the build's Standalone Test Cases tab. Click on the vertical menu
on the left side of the specific standalone test case, choose
Remove and confirm your selection.
The standalone test case will be removed and not included in future builds. However, existing test sessions will still have these standalone test cases.
Test Session Execution
- Start a Test Session - There will be a Start a Test Session
button if this will be the build's first test session, or there will be a New Test Session button if there has been a previous test session. To start a test session, click the button to start the test execution. Note that test sessions can only be started if they are released for testing first.
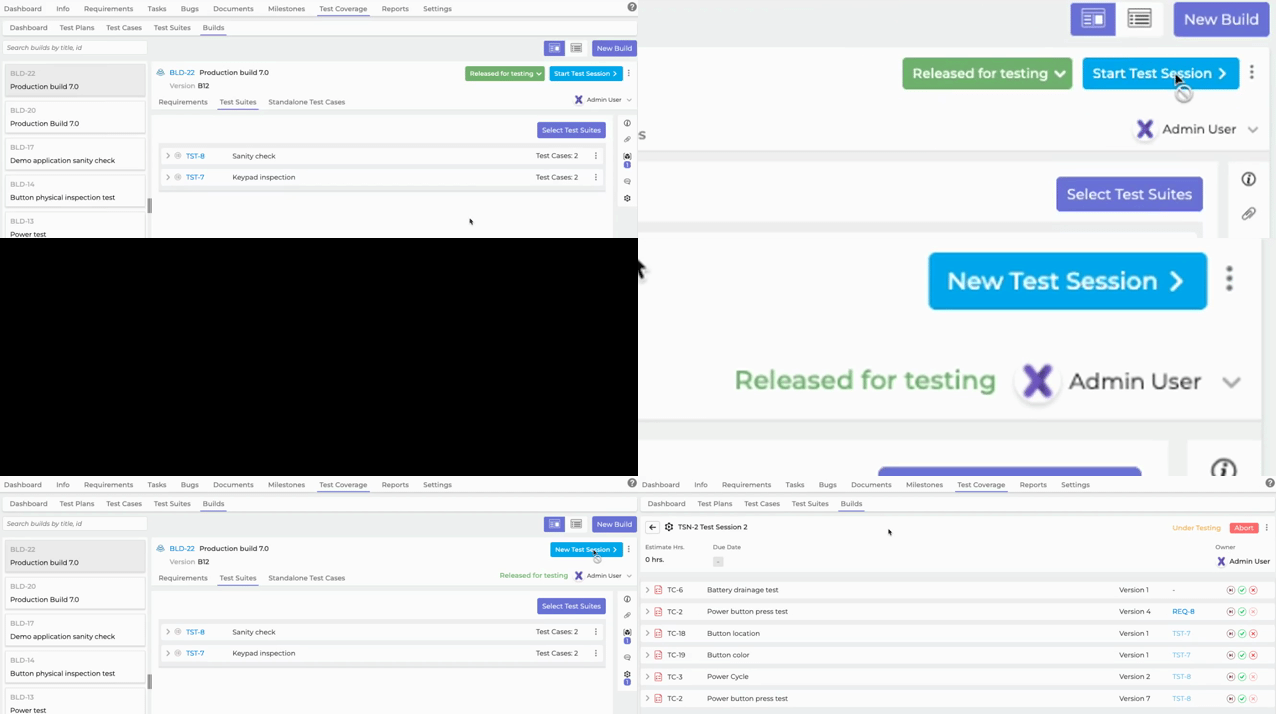
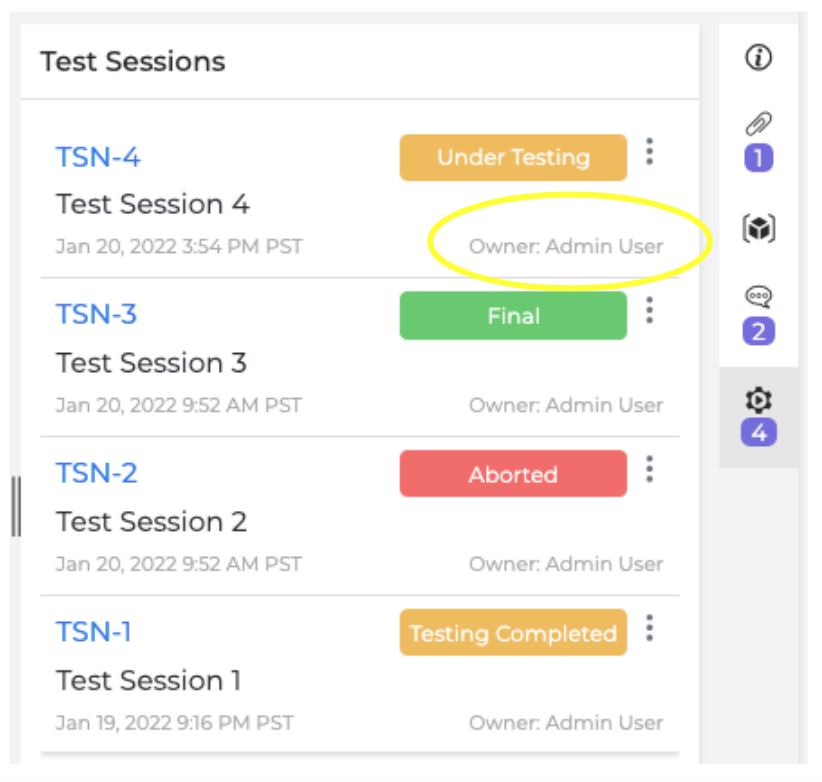
- Test Session Owner - By default, the owner of a test session is the project member who started the test session. This field cannot be edited. To view the owner for a specific build, click on the test session icon
on the right side vertical menu. This will expand to show the list of test sessions, and the owner will be listed below the test execution status. Alternatively, you can also click on the specific test session and the owner will be listed on the right side under the test execution status.
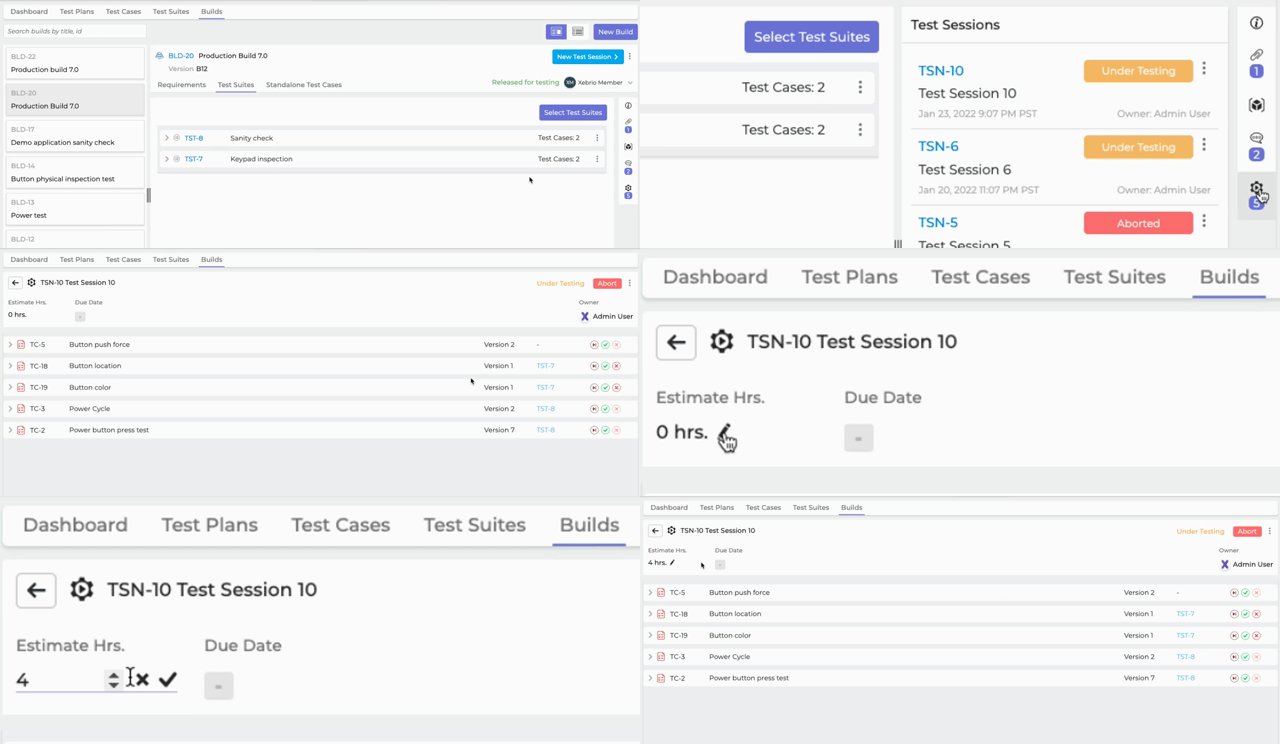
- Enter estimated hours - Estimated time for the build can be added under the Estimate Hrs. field. Hover over the current number, initially at 0 hrs., until an edit
icon appears and click on it. Enter an integer value and click
or hit enter. There will be a field to include actual hours once all the test case steps have been marked with a result.
Once a test session is marked as final, you will not be able to edit the estimated or actual hours.
- Test Case Step Results - You can record results for each test case step, and mark each step as either pass
or fail
. Once all the pass/fail outcomes of each step of a test case have been recorded, the entire test case result will be marked accordingly.

If any test case step is marked as fail
, the test case will also be marked as fail
.

- Mark a Test Case as Pass- You will be able to mark an entire test case as pass
. Individual test case steps will be automatically recorded as pass
. Results can be edited until the test session is marked as Final or aborted.

- Mark a Test Case as Fail- If the test case only has one step, you will be permitted to mark the entire test case as fail. If the test case has 2+ steps, you will need to record a fail
for the appropriate step(s). This will mark the test case as a fail
, and will include a bug icon to record a bug for this failure.
In the example below, test case TC-4 has one step and test case TC-8 has multiple. TC-8 can only be marked as fail when the appropriate step(s) is marked as fail.

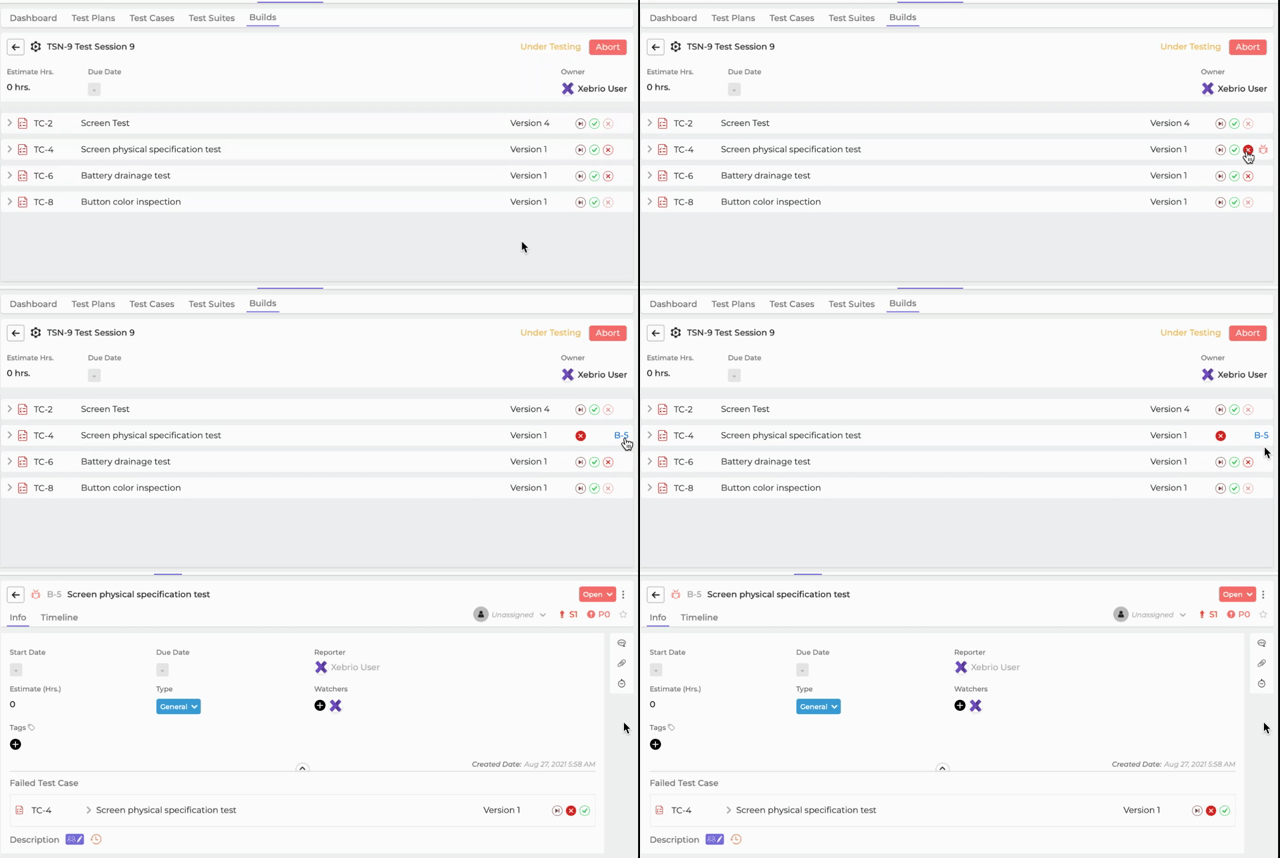
- Create a bug from a failed test case - During test case execution, if a test case step is marked as fail
, a bug icon
will appear on right of the test case title row. Click on this icon to create a bug, and the
icon will be replaced by a bug ID. Note that users will also need permissions in the bugs module to create bugs from a failed test case.
Clicking on the bug ID will open up the bug details where the title is defaulted to the test case title and the reporter is the test session owner. The failed test case will be listed above the bug description area. In the bug details window, you will be able to edit the bug details.
- Skip a Test Case - You can skip a test case by using
. Results can be edited until the test session is marked as Final or aborted.

- Test Session Testing completed - Once all test cases in a build are complete (i.e. marked pass/fail/skip), the testing will be completed and marked Testing Completed accordingly. You may still edit results in this stage.

- Mark a Test Session as Final - A test session can be marked as Final when all test cases within a build are marked as either pass, fail or skipped. To mark a test session as final, click the Mark As Final button on the extreme right of the test session title row. Click Yes on the confirmation window to mark the test session as Final. Once final, you will be unable to edit results, estimated and actual test session hours, and due date.

- Enter actual hours - When all test cases within a build are marked as either pass, fail or skipped, a field will appear to include actual hours spent for the build. Hover over the current number, initially at 0 hrs., until an edit
icon appears and click on it. Enter an integer value and click
or hit enter.
Once a test session is marked as final, you will be unable to edit this field

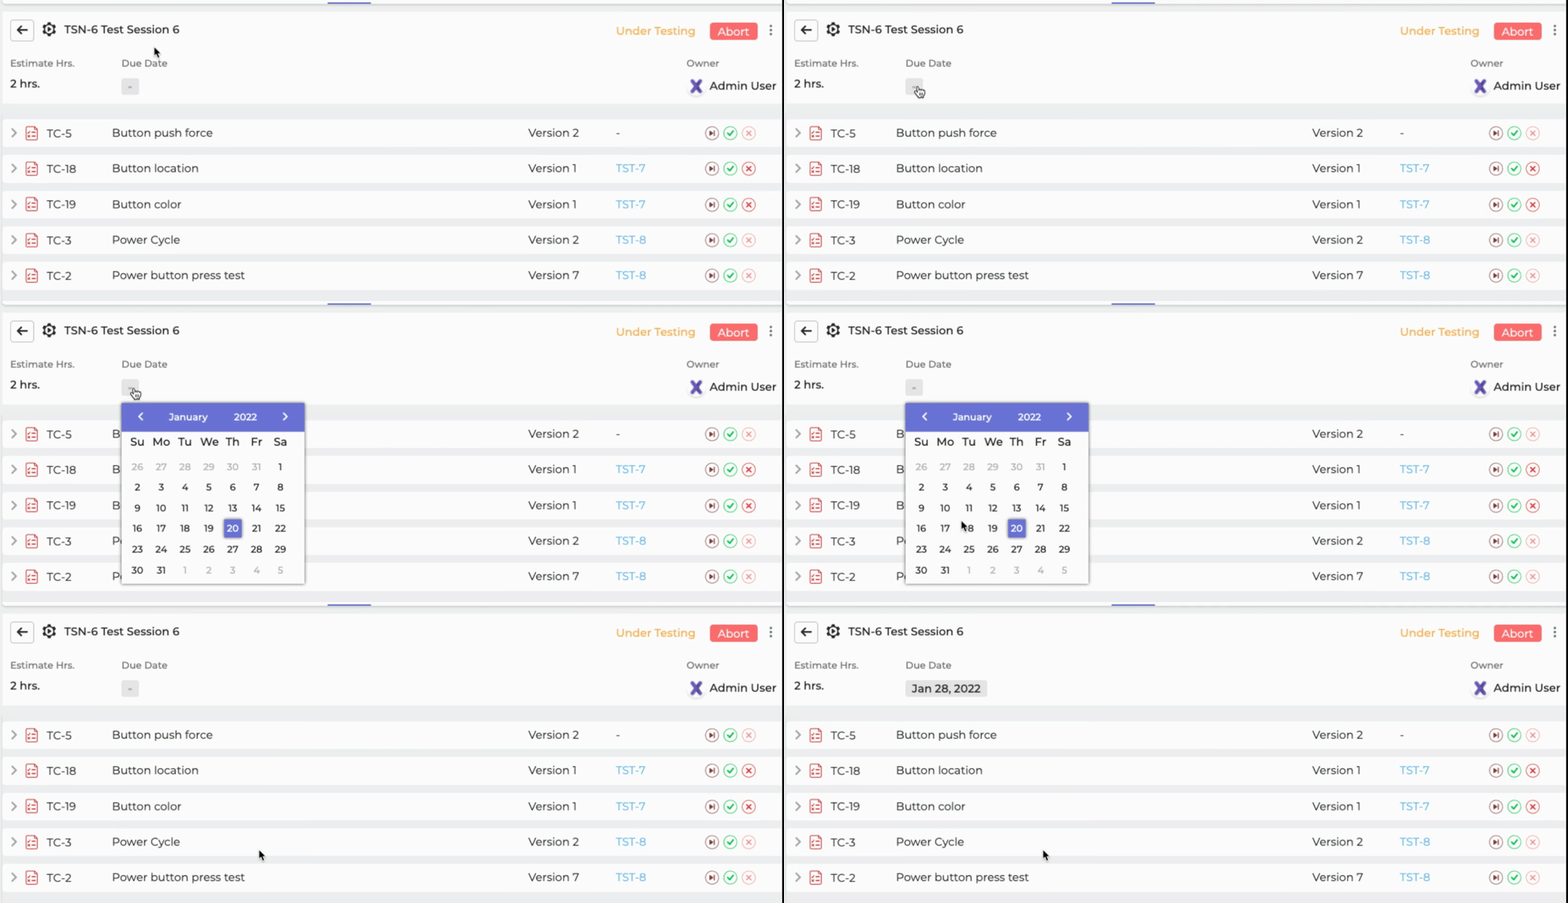
- Test Session Due Date - If you would like to include a due date for a test session, this can be done in the test session details window. Click
 under Due Date to select the desired date using the calendar pop-up. Once a test session is marked as Final or if a test session is aborted, a due date can no longer be added or edited.
- Abort a Test Session - For sessions with status Under Testing, a red Abort button will be present. Click on Abort to end the session. Once a test sessions is aborted you will be unable to edit results, due dates, hours.

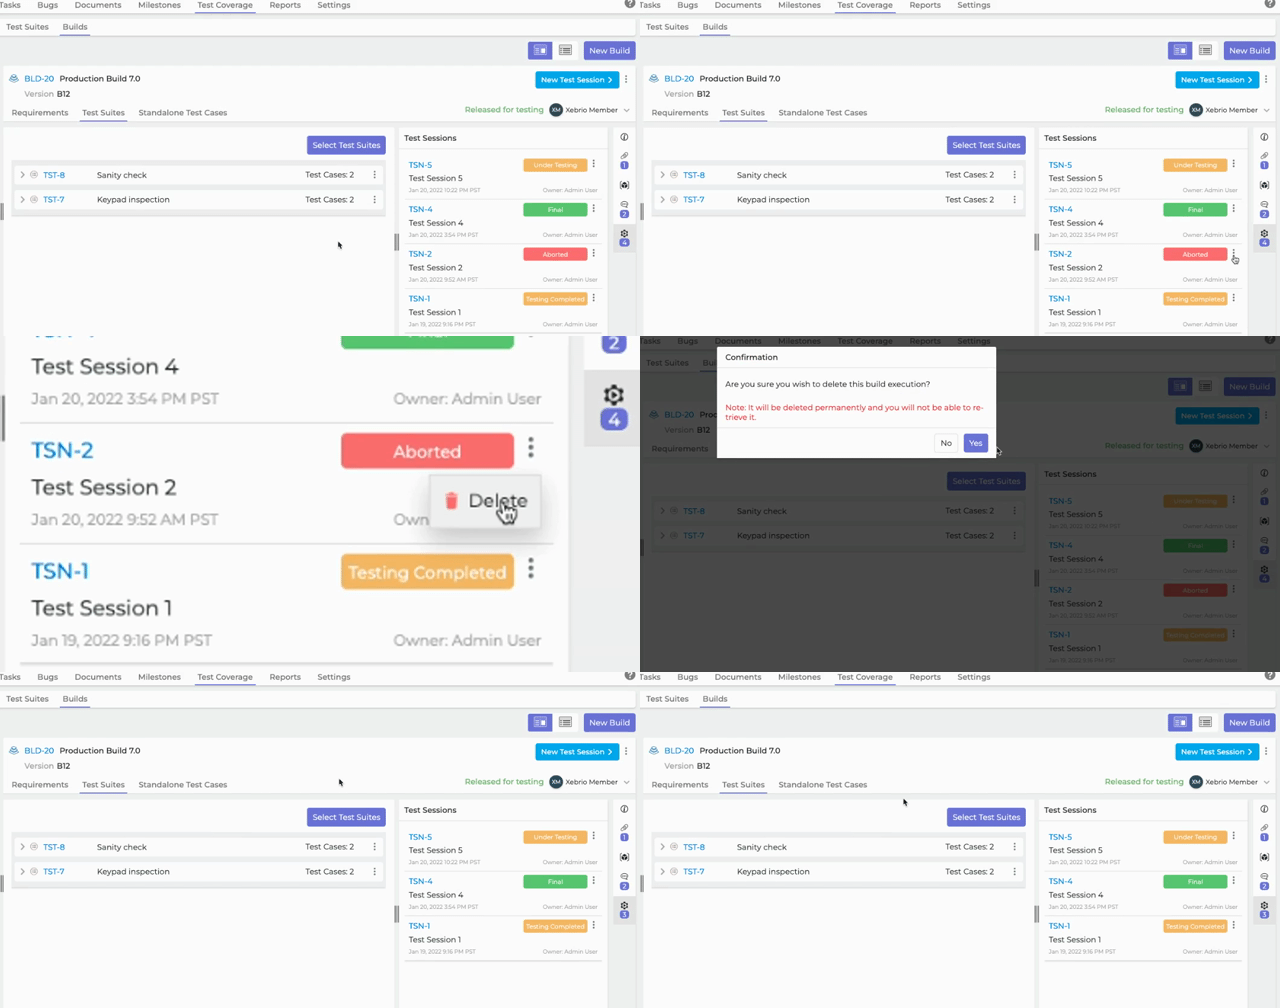
- Delete a Test Session - To delete a test session, click on the test session icon
on the right side vertical menu. This will expand to show the list of test sessions. For the specific test session, click on the menu icon
and choose
Delete. Users will need delete permissions in the test coverage module to perform this action.
Comments
Please sign in to leave a comment.