Task Details
Subtask
- Task ID Number - The task number is generated by Xebrio in order of creation. This cannot be edited.
- Task Title - This can be edited at any time by hovering the mouse over the current title until the
edit button appears. Edit the title and click
to save, or click
or outside the title edit area to cancel editing.

- Status - The default status for a task upon creation is Not Started. To change the status, click on the dropdown on the right to select the task's current status. There are six system default statuses available in Xebrio - Not Started, In Progress, Completed, Duplicate, Deferred and Blocked. Project owners can also add customized statuses, which are created and added to a project in the Project's Settings menu.
Note that a parent task or a subtask cannot be marked as duplicate, hence this status will not show in the status dropdown. Additionally, Parent tasks will only have the option to be marked as complete once the subtasks are marked as complete.

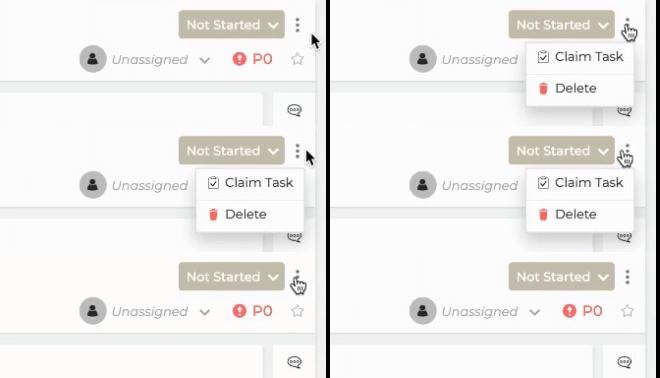
- Menu
- When you click on the Menu button, you will either be able to claim the task or delete the task. If the task is unassigned or assigned to someone else you will be able to claim it. The conditions for which you can delete a task can be found here, link article.
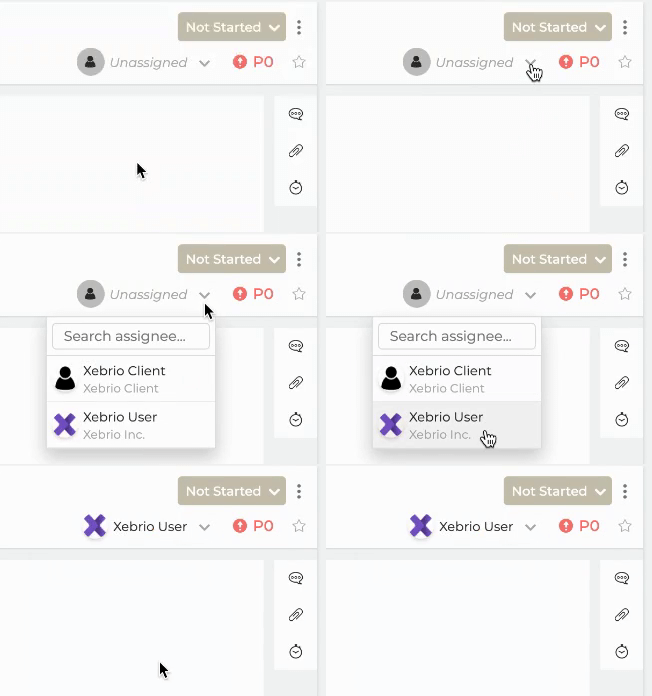
- Assignee - The assignee is the team member who should complete the task. When a task is first created, by default assignee is Unassigned. Click on the current assignee to view a drop down of available members to for whom to assign the task. The assignee will receive a notification in their Notifications tab that the have a new task assigned to them.
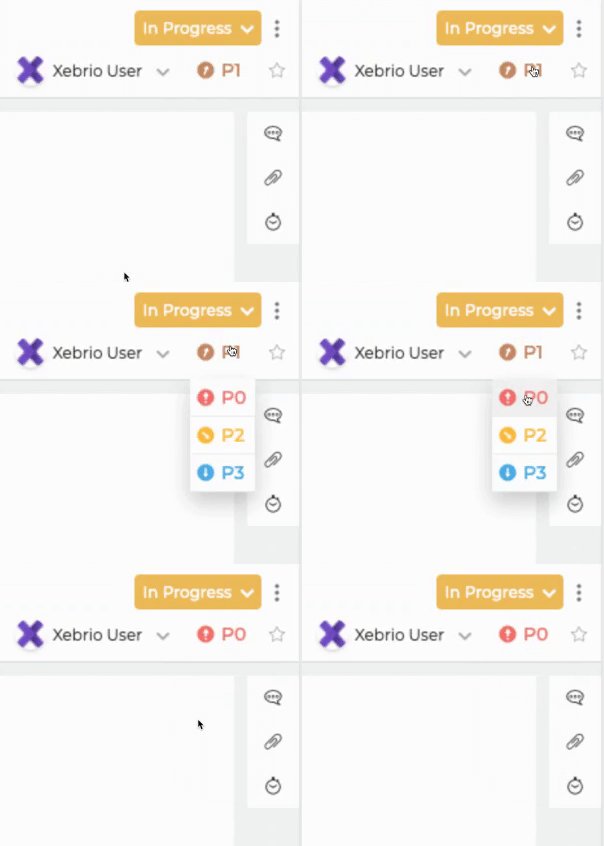
- Priority - Designate a priority for the task. To edit, click on the current priority and select the desired task priority from the dropdown. Task priorities range from from P0 to P3. At task creation, the task priority is set to P0 by default. In general, the priorities are designated as:
-
- P0 - Essential product feature
- P1 - Important, but the product can work without these
- P2 - Nice to have, but not required
- P3 - Informational only that can wait
-
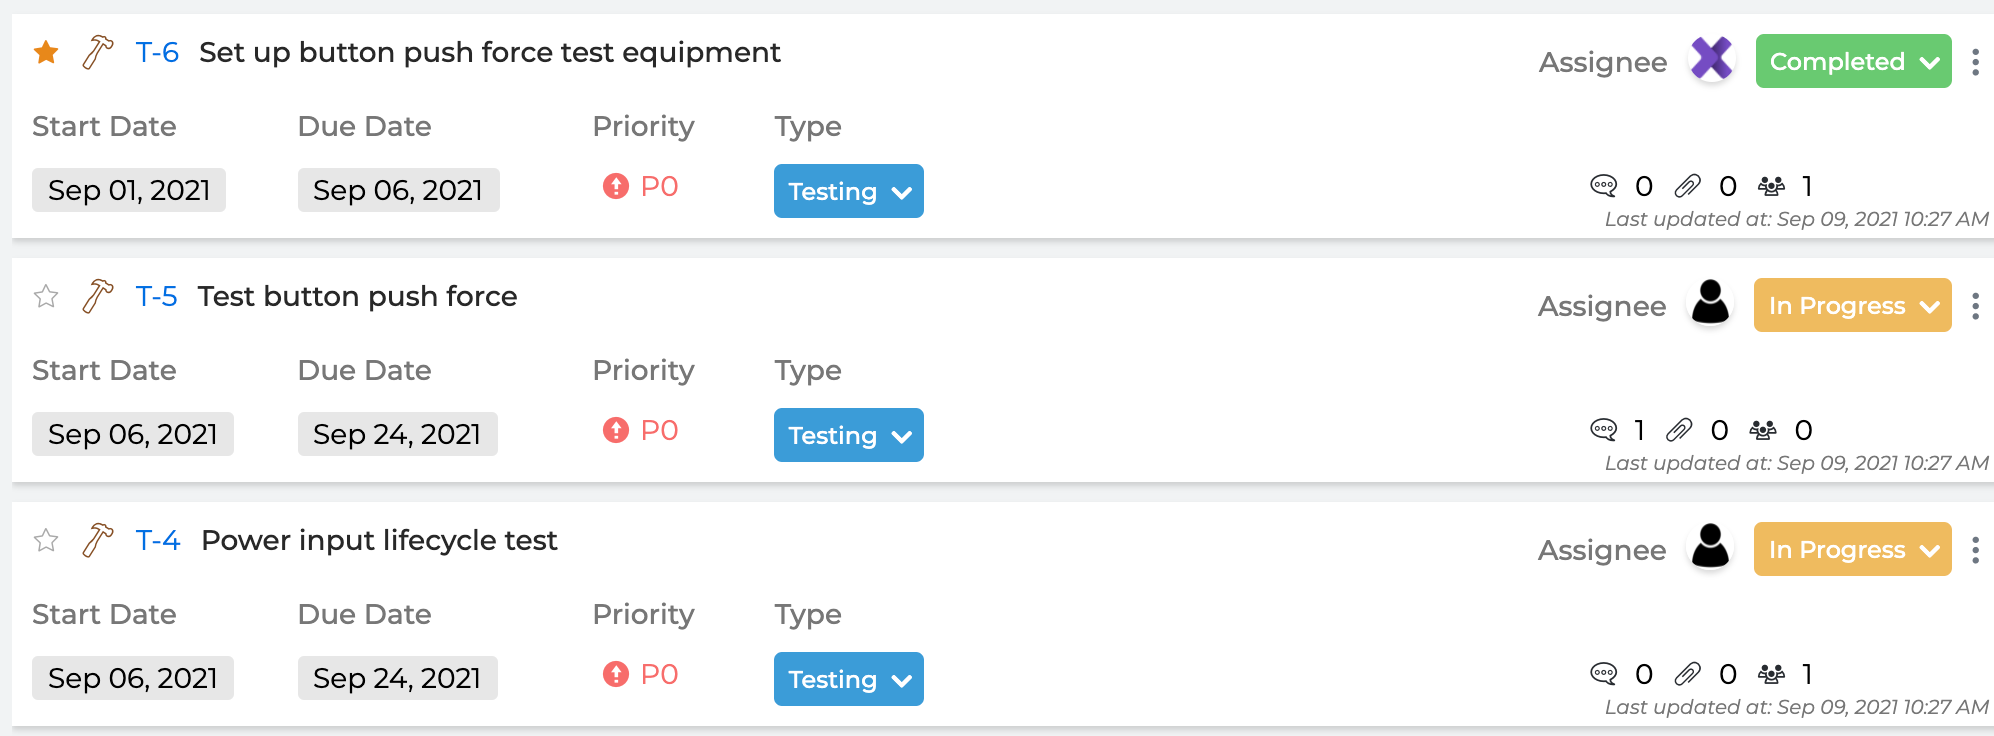
- Favorite - Click on the star to designate the task as a favorite
 . Favorites will easily be seen in the task list view.
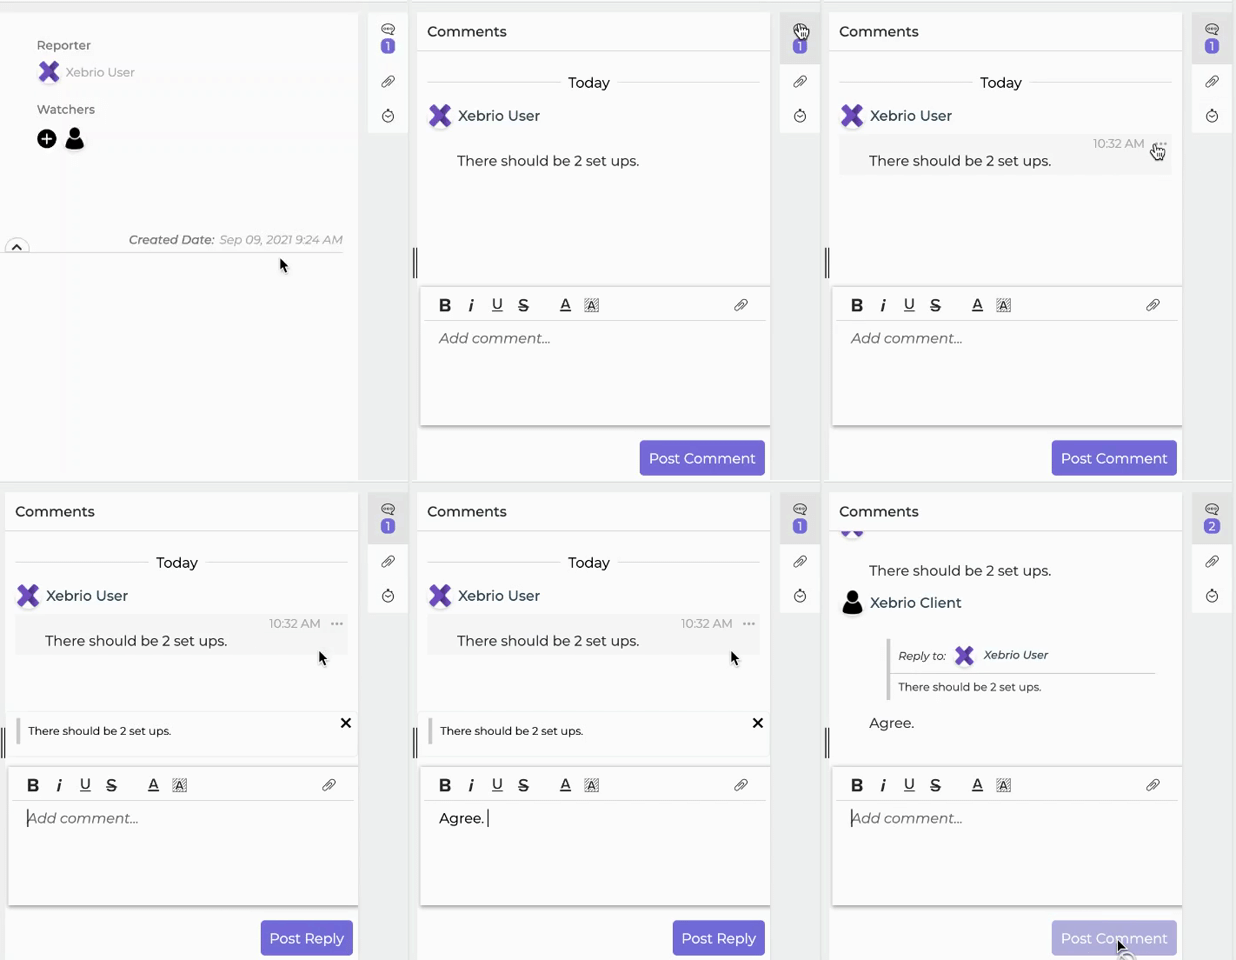
- Comment - Comments can be made to a task under the comments
section on the right side vertical menu. To reply to a specific comment, hover over the comment until the horizontal menu
appears where you can click and choose to reply.
If you made a comment, you can edit, reply, or delete it. A deleted message will still appear as a message reading "Deleted message". A highlighted number below icon specifies the number of comments.
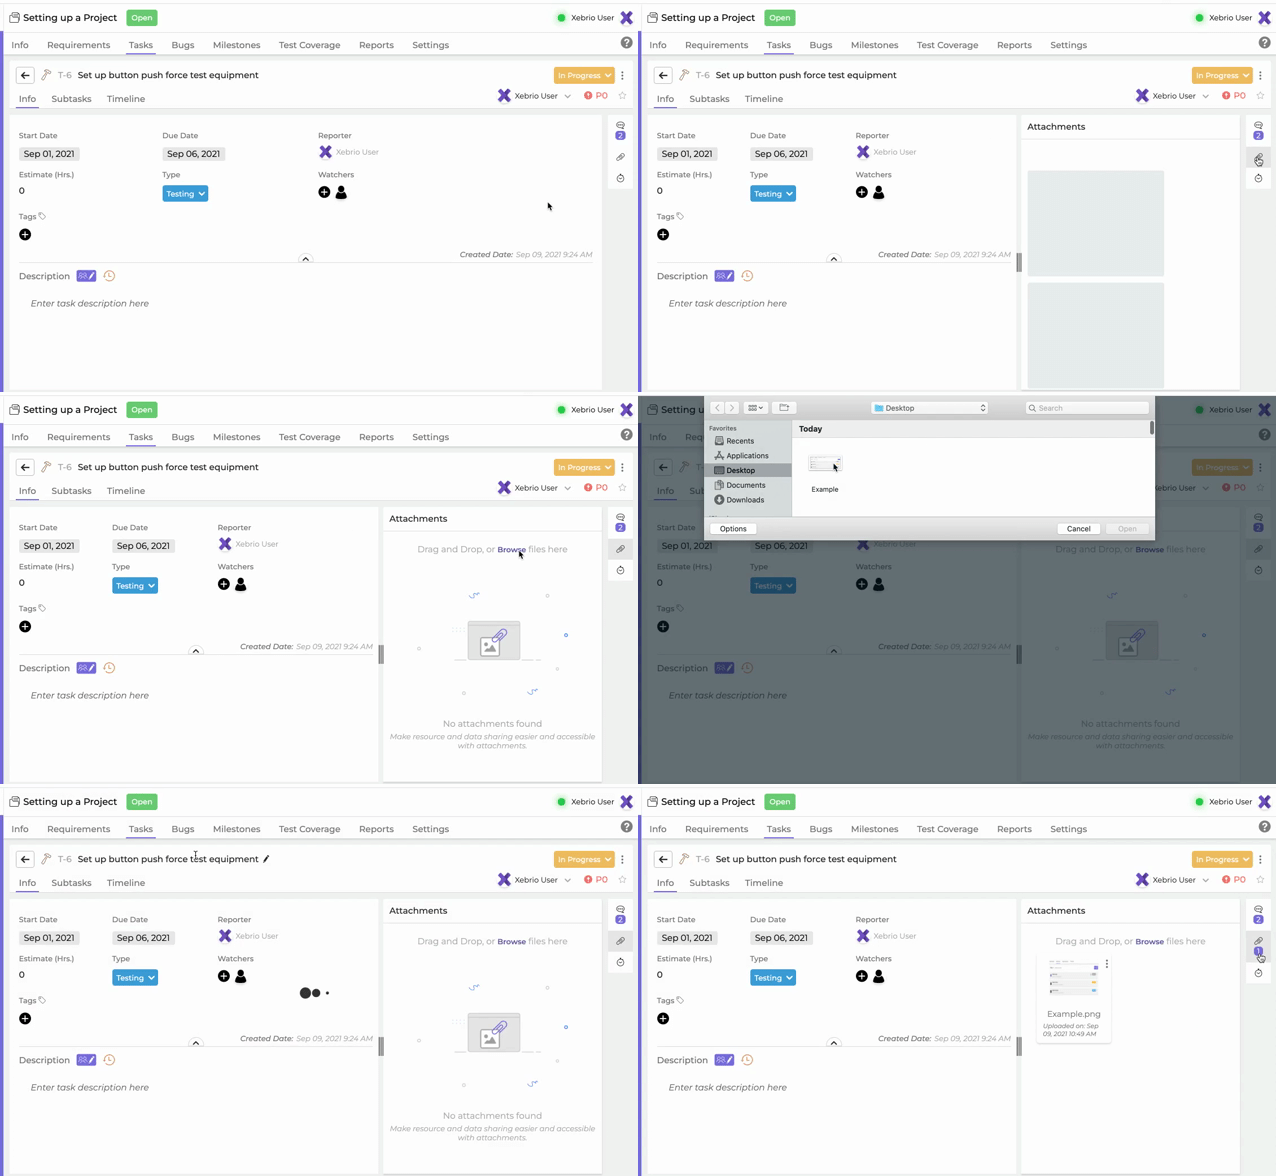
- Attachments - To help with collaboration and allow resources and data to be more accessible. files can be attached within tasks. Attachments can be added to a task using the
attachments section on the right side vertical menu. Once attached, each attachment will have a vertical menu
for which you can click to either download or delete the attachment. A highlighted number below the
icon specifies the number of attachments.
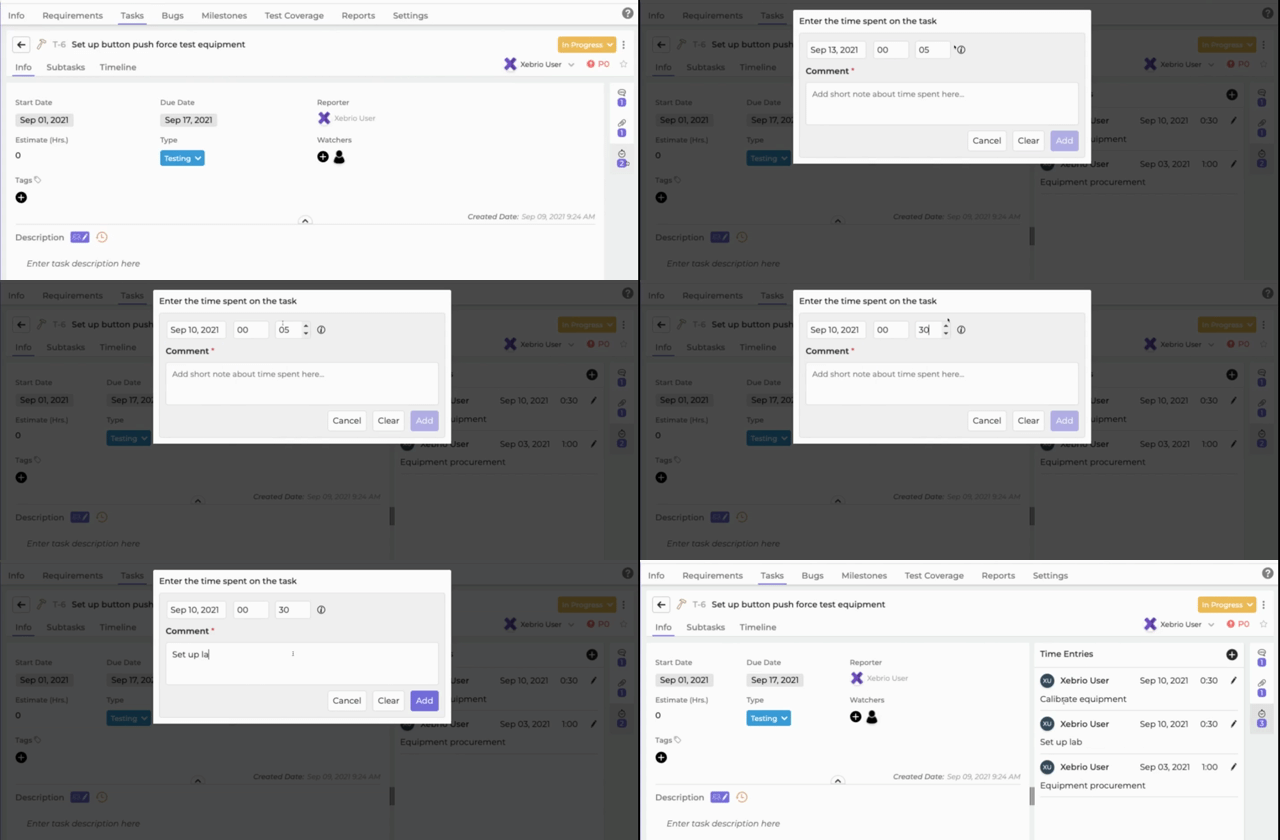
- Time Entries - Team members can keep track of the time spent on each task and analyze what kind of tasks require how much time to plan better. To do this, click
in the vertical menu on right side of the Info tab for the specific task. Click
, enter the time and a short description of the work being done.
Time entries cannot be recorded for future dates nor dates prior to the project start date. Nor can entries fall outside the timeframe between the Start and Due dates of the task. Entries must be at least 5 minutes.
- Reporter - The reporter is the team member who created the task. This field is not editable.
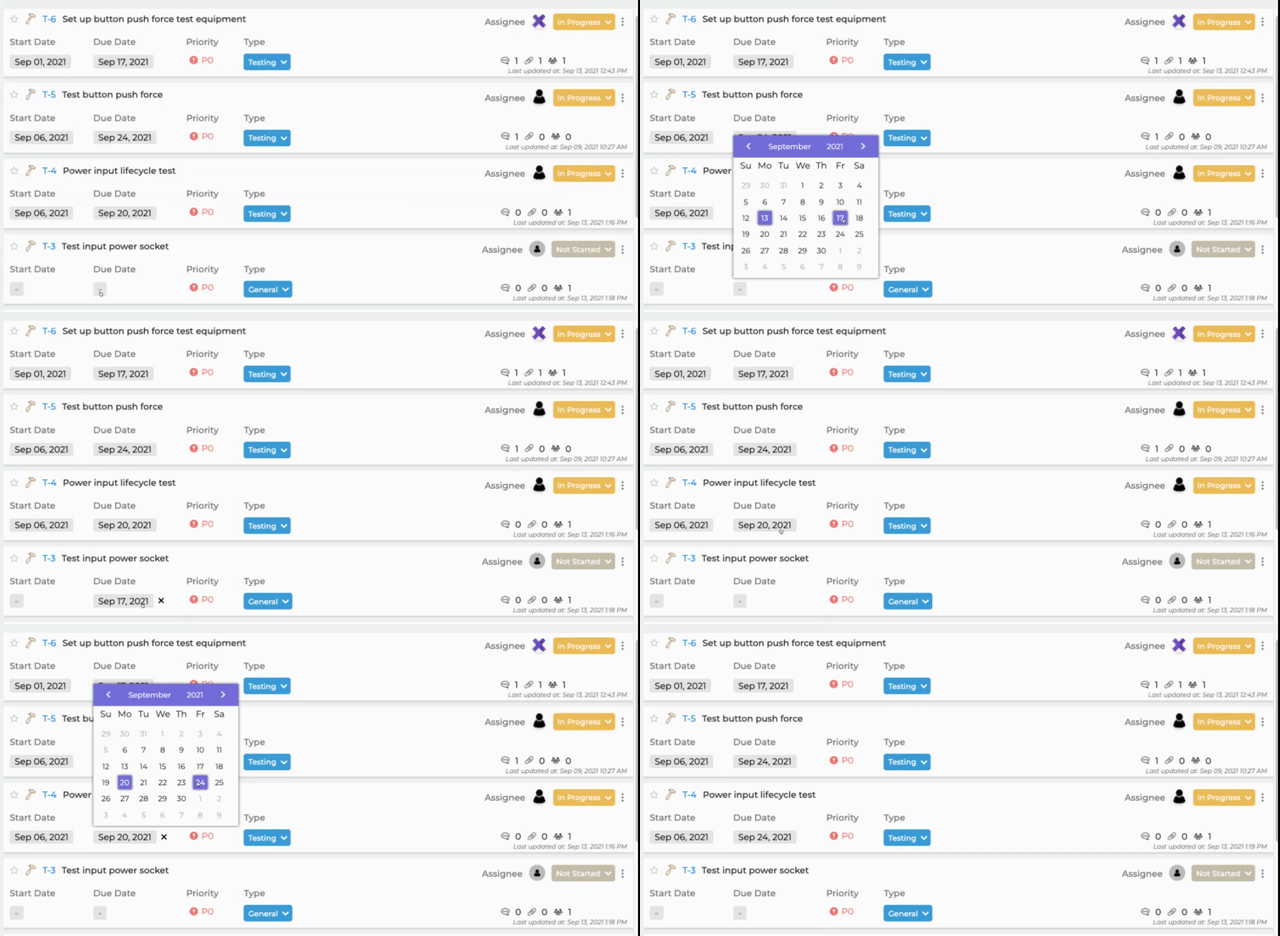
- Start and Due Dates - If you would like to set a start and due date for the task, you can do so in the details area under Start Date and End Date. Upon creation of a task, the default is a blank field set with a hyphen (-) below the Start Date and/or Due Date. To set a date, click on the hyphen and select an appropriate date from the pop-up calendar. Alternatively, if there are dates already set, click on the current date to open the pop-up calendar.
To remove a date, hover over the current date until a appears which you can click to keep the specified date field blank.
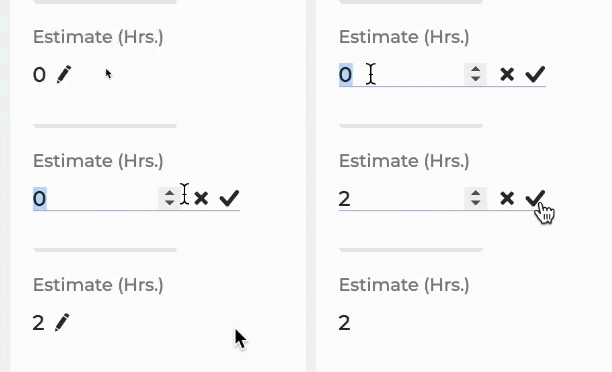
- Estimate (Hrs) - To add a time estimate for the task, hover your mouse over the current estimate time (which at first creation is defaulted to 0 hours) and click
when it appears. In the input field, enter in a number or use the up
and down
arrows to add/edit the estimate for the task. Click
or press enter to set the changes, or click
or outside the edit area to cancel changes. Estimates can only be integers
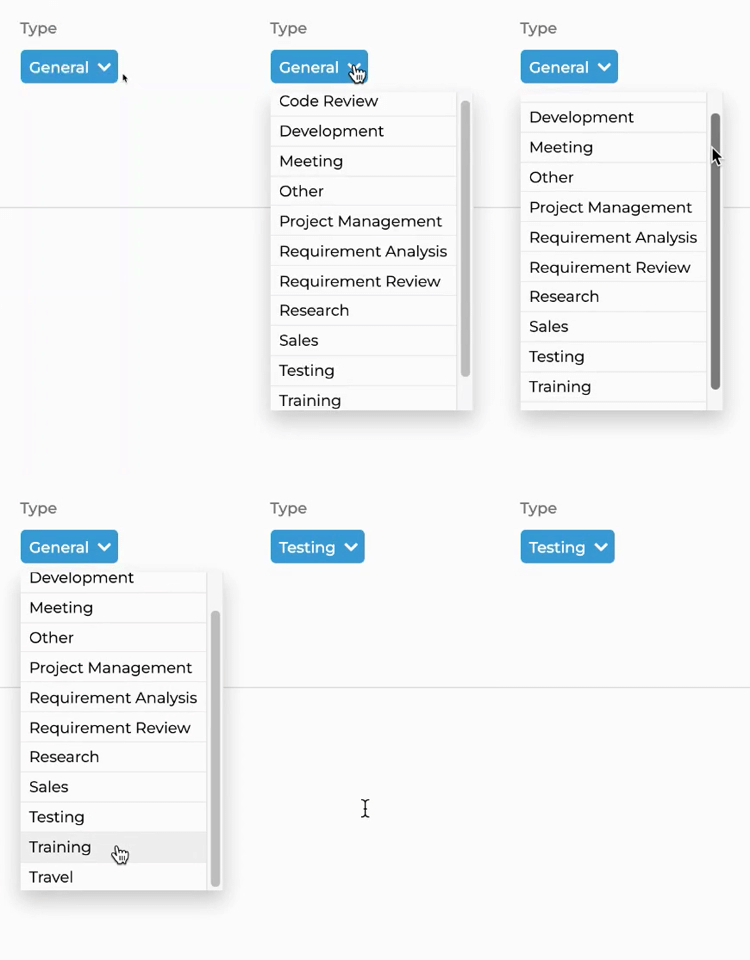
- Type - The default type for a task upon creation is General. To change the type, click on the dropdown and select the new desired type. There are twelve system default types available in Xebrio: General, Code Review, Development, Meeting, Other, Project Management, Requirement Analysis, Requirement Review, Research, Sales, Testing, Travel. You can also add customized types, which are created and added to a project in the Project's Settings menu by a project owner.
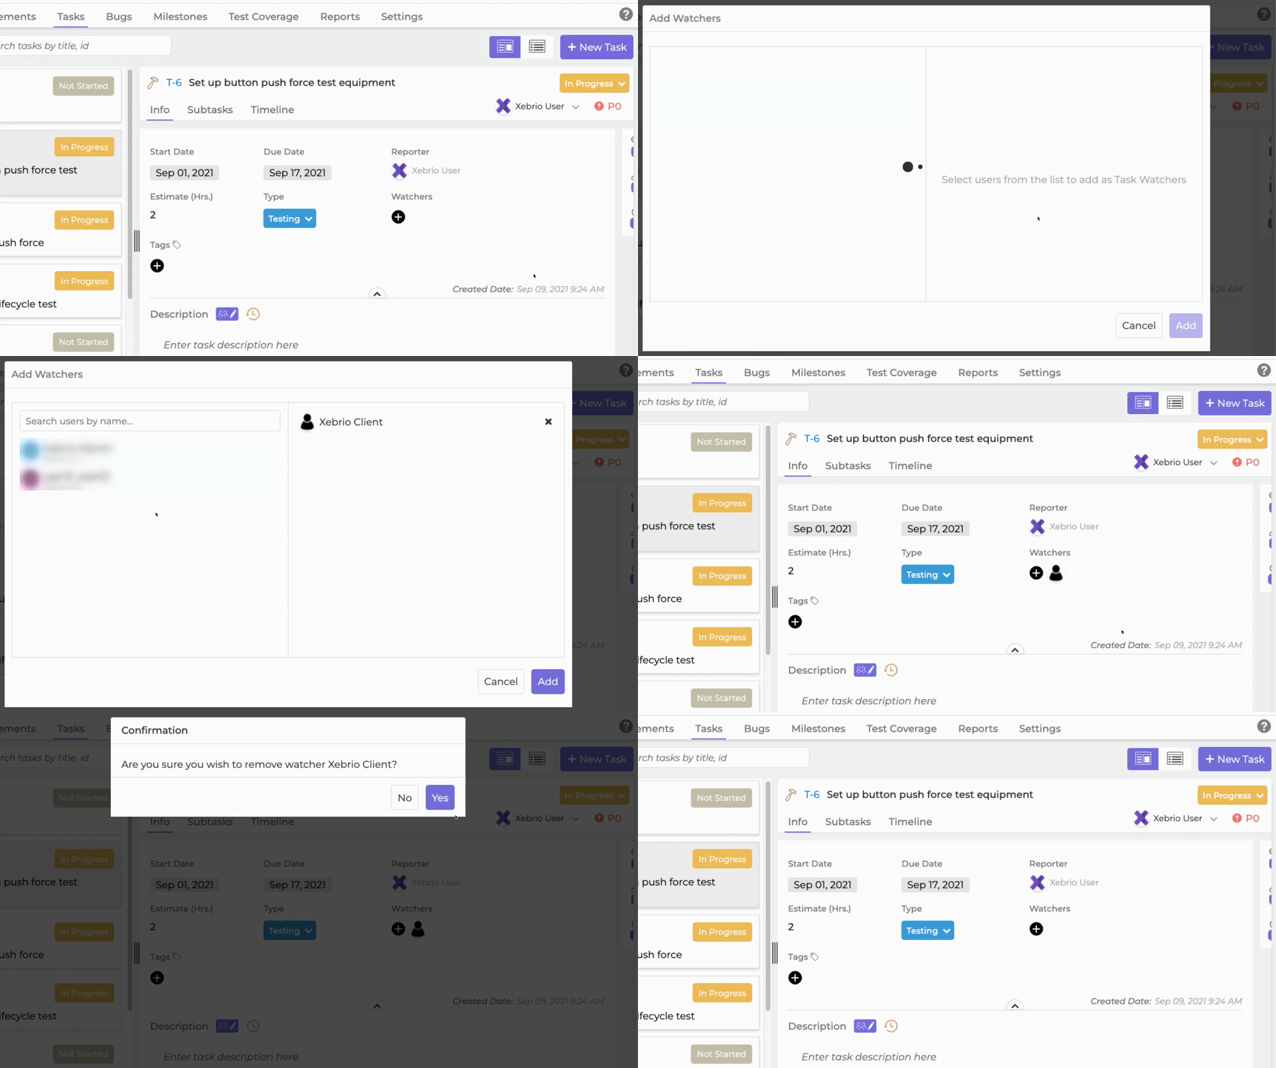
- Watchers - You can add team members to be watchers for a task. Click
under Watchers and choose the users to be added. If the task is made visible to client users, you will be able to view all project members, including those who are added as clients to the project.
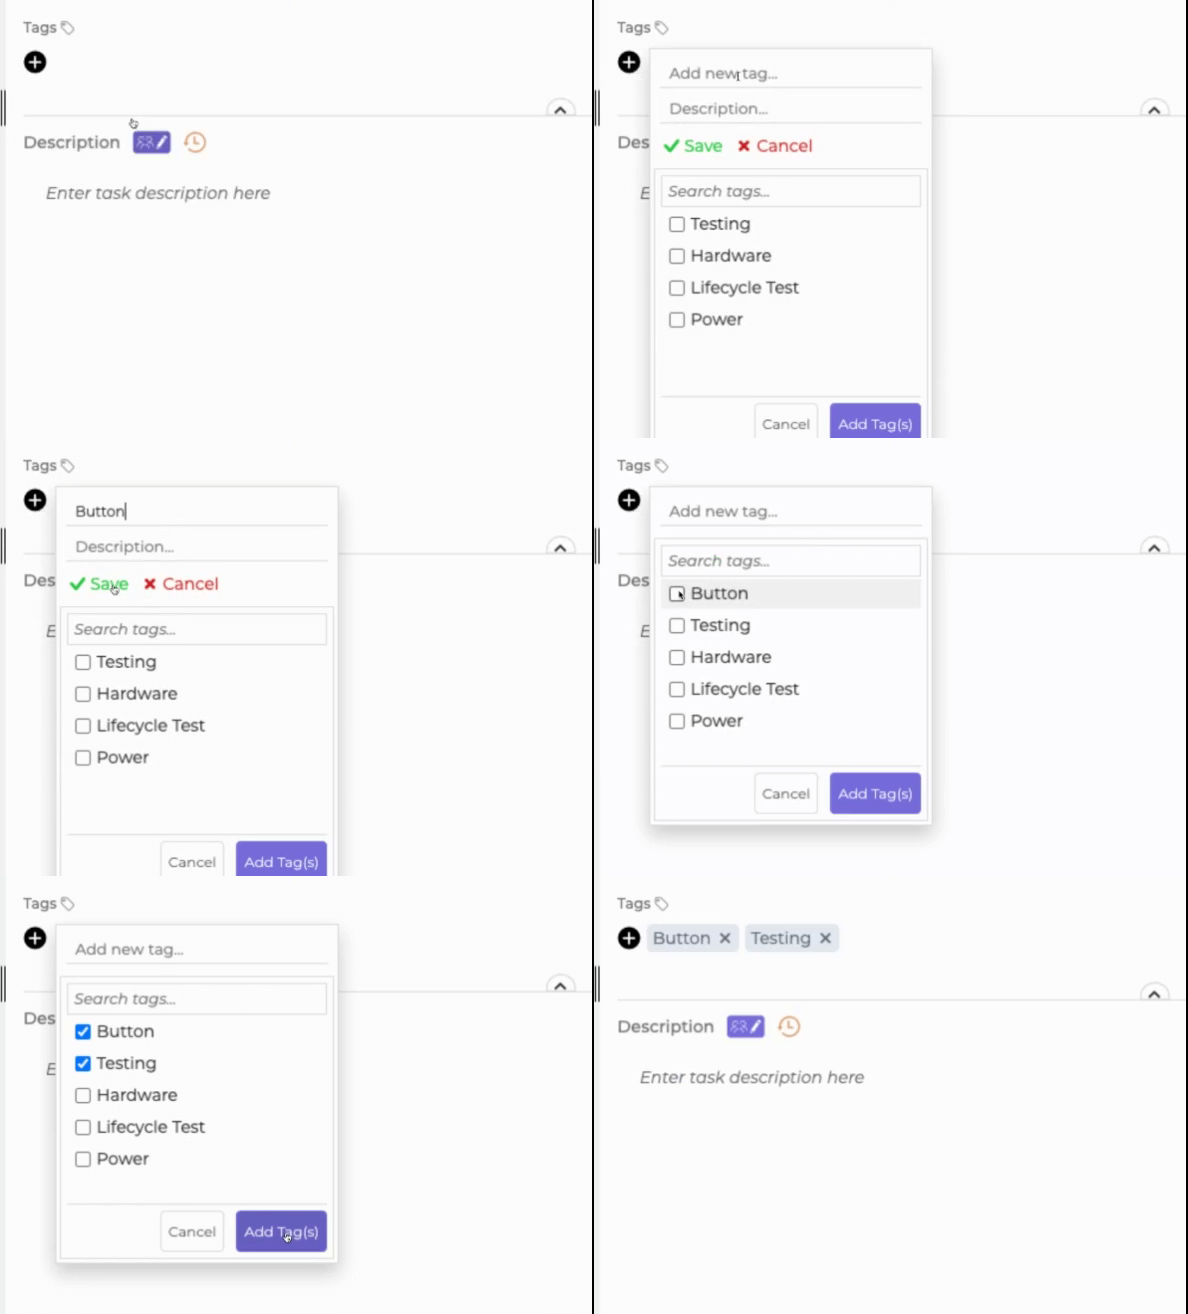
- Tags - Tags can be created for tasks to categorize and filter tasks and to customize what your task list looks like. Click
next to Tags and choose the tags to be added from the dropdown. Tags that are created and made available in Settings by a Project Owner are listed in the dropdown.
- Description - The task description can be edited by multiple team members simultaneously. Click on the Edit
button to collaborate on the description, then click Done
to exit edit mode.

- Subtasks - In the tasks secondary tabs, you may choose to link or create subtasks. Note that if your task does not have a subtask tab, then it is already a subtask to a parent task. A task will have a
icon, while a subtask will have a
icon and the parent task will be listed in the details window, under the Tags.
To link an existing task as a subtask, navigate to the Subtasks tab and click New button and choose
Link Tasks. Click on the task from the list of available ones to link, and click Add.
If the task you would like to add is not listed, it may be for the following reasons:
-
-
-
- Marked Complete
- Listed as a Duplicate
- Parent task is inked to a Requirement. Desired subtask must also be linked to the same requirement version as the parent task, if the parent task is linked to a requirement
- Desired subtask is linked a requirement version while the parent task is not
-
-
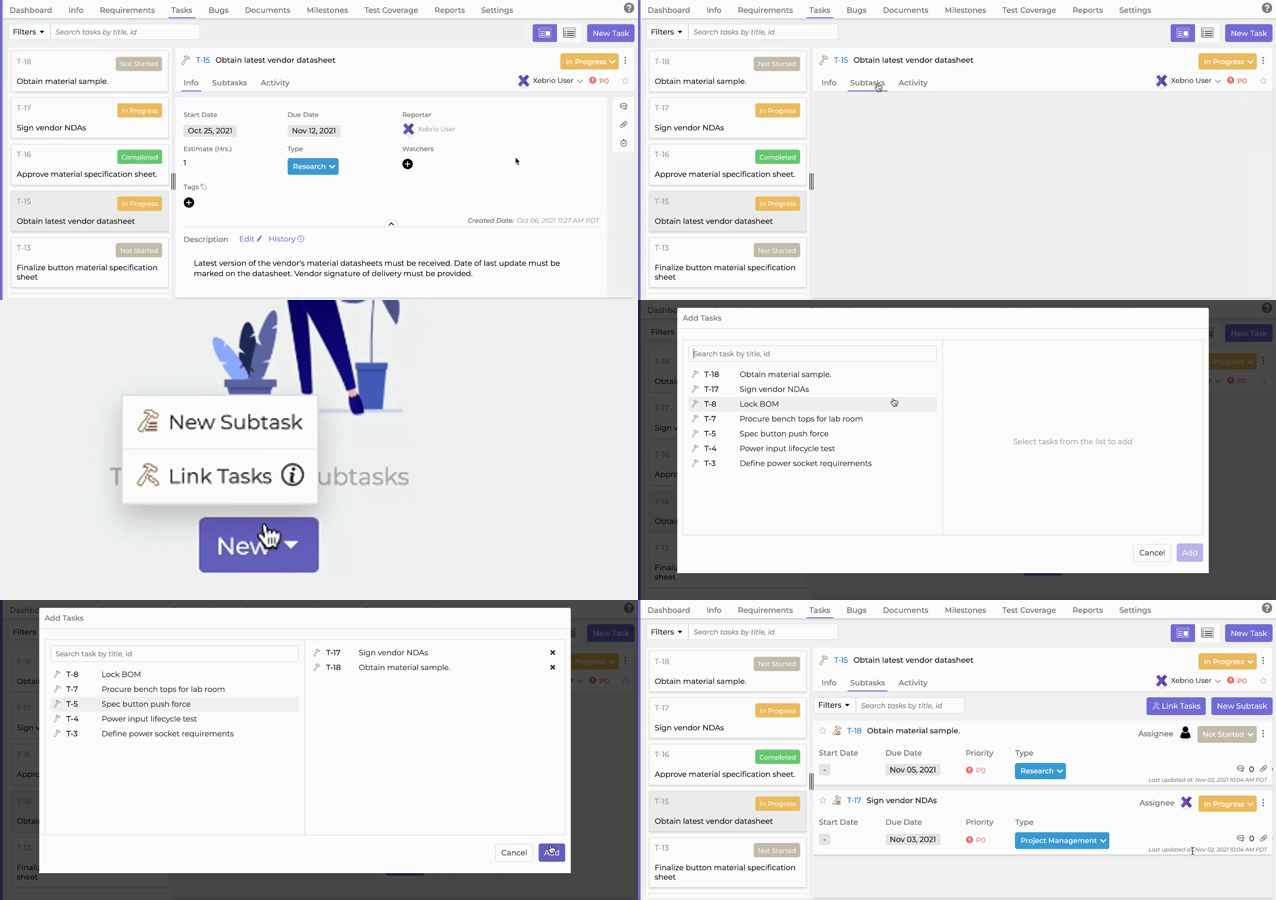
You may also create a New Subtask by clicking New and then choosing
New Subtask. Add a title and click Save to add the subtask.
Note that a parent task or a subtask cannot be marked as duplicate, hence this status will not show in the status dropdown. Additionally, Parent tasks will only have the option to be marked as complete once the subtasks are marked as complete.
Comments
Please sign in to leave a comment.