System admins will be able to access a Billing tab in the Admin module. To access this area, click on the Admin module ![]() on the main left vertical pane, and then to the Billing tab on the horizontal menu.
on the main left vertical pane, and then to the Billing tab on the horizontal menu.
Depending on your subscription status, this Billing screen will appear different. Skip to Users using a free trial or Users signed up with a subscription for the most appropriate help coverage.
Users using a free trial
If you are currently under a Free Trial, your Billing tab will have a single Subscription sub tab. In this sub tab you will be able to compare the estimated prices and features between the available plans, total number of users in your plan, and your free trial start and end dates.

Note that prices and plans shown in these images may not reflect current offerings
Comparing recommended plans
The Subscription sub tab provides a comparison of the included features for each plan and unit costs. You can view the total cost a plan by clicking on the Select button and viewing the estimated total cost on the bottom bar. Your selected plan for which you are viewing the costs for will read Selected. You can change between Monthly and Annual estimates by clicking on the desired timeframe.
Click the View all features button to expand the list of features for the plans.
Get a plan
When you are ready to sign up for a plan, click Select on your desired subscription. Your selected plan should then read Selected. From there, hit Get Plan to be taken to the next payment steps.
Users signed up with a subscription
If you are currently signed up for a plan, you will have three tabs available: Subscription, Payment, Invoices.

Subscription tab
In this tab, you will be able to view your current pricing plan, features including in your plan, start and ends dates of your plan, billing type (monthly or yearly), number of active/billable users, unit price, upcoming bill estimate and bill date. You will also be able to change your plan or cancel your subscription from this tab.
Change your plan
Click on the Change Plan button to view and compare your current plan against other plan options. Your current plan will read Current on the bottom. If you would like another plan, click on the Select button of the desired plan to select and hit the Change Plan button on the bottom right corner.
Cancel your subscription
Find and click the Cancel Subscription button and confirm your choice.
Managing billable users
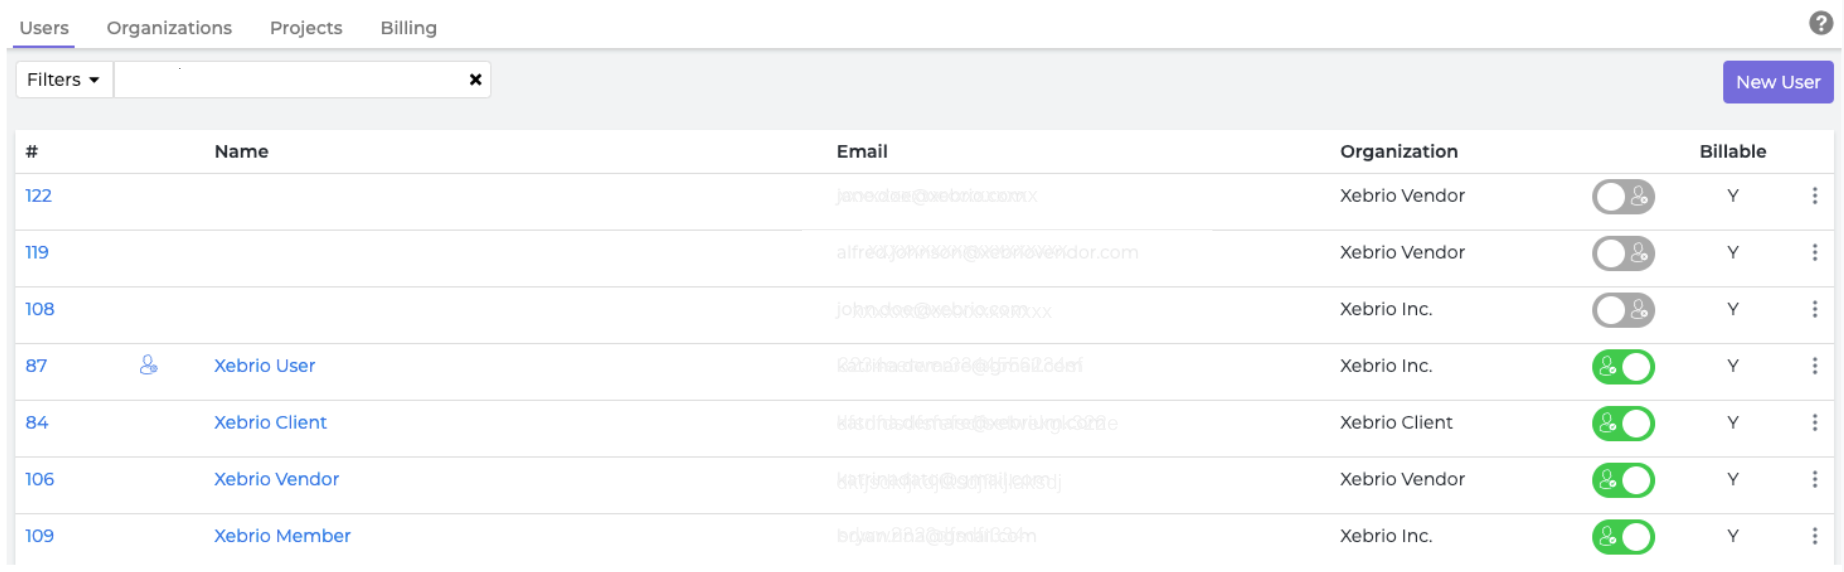
You may view more details on your billable users by clicking on the Manage Users button. This will take you to the Users tab in the Admin module. For each user, you will be able to view their billable status as either a Y (billable) or N (not billable).
Note that users which have been added and are still in the process of completing or need to complete the activation process will be considered a Billable user.
You may view this data by also going directly to the Users tab.
Payment tab
In the payments sub tab, you can view and edit your current payment method, add/delete a payment card, view and edit your billing address, view and edit your business details.
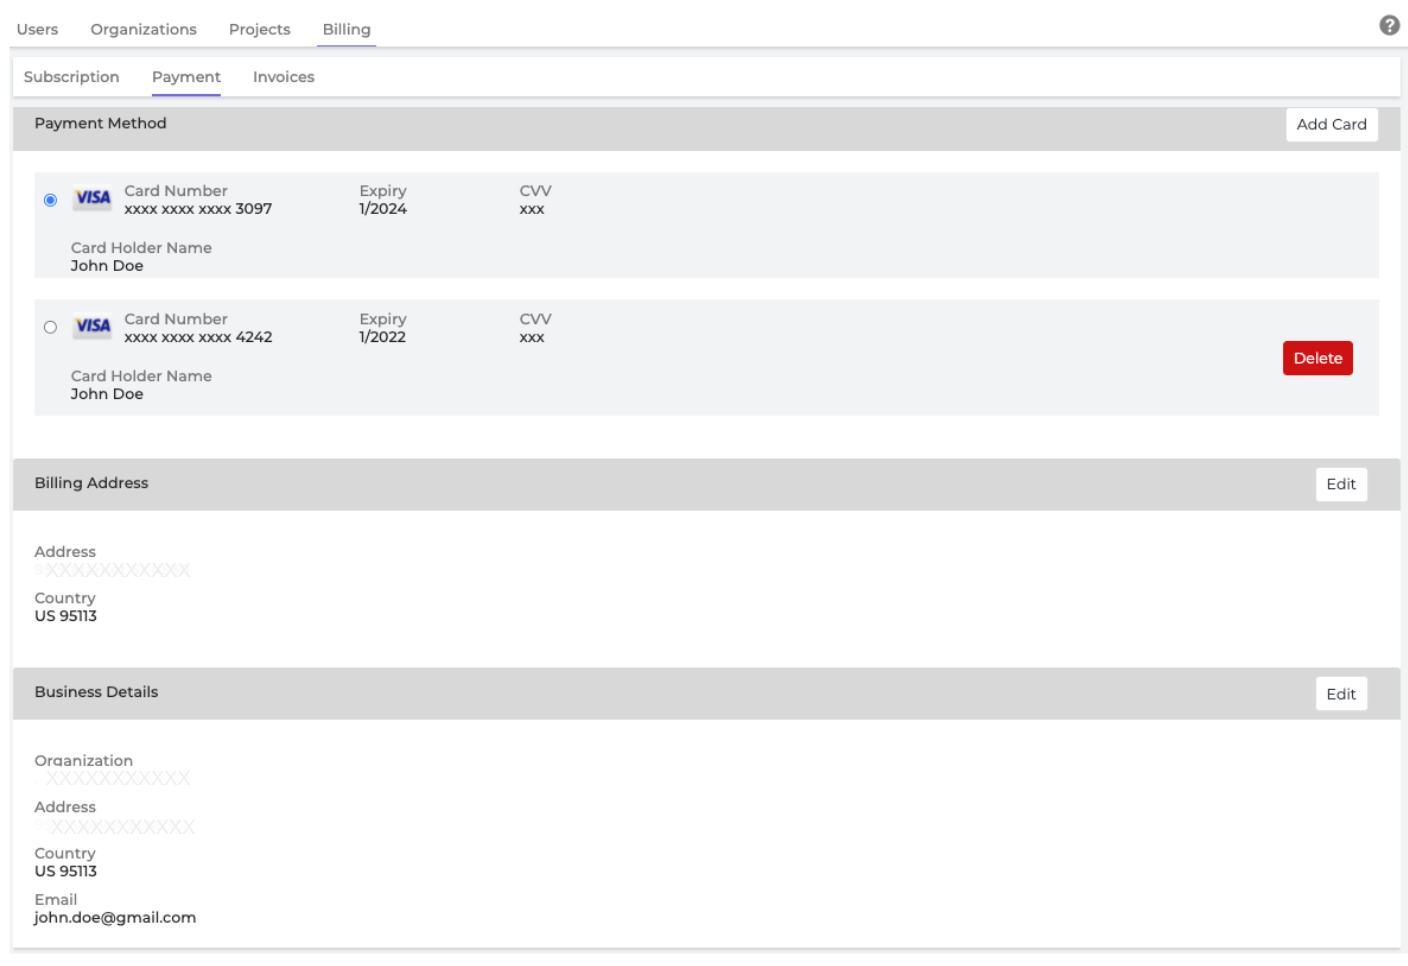
Add a payment method
In the Payment Method section, click the Add Card button to enter in a new card.
Choose a different payment method
If there are multiple payment methods, you can choose a different payment method by clicking on the desired one. The default method will be indicated by the colored selection dot on the left side of the payment method line.

Delete a payment method
For instances where there is more than one payment method, there will be a Delete button for each payment method with exception to the default method. Change the default payment method if you wish to delete the current payment method.
If you only have one payment method, you will not have an option to delete. You must add another card and select the new card as the default payment method first.
Edit the billing address
The billing address is shown in the Billing Address section. Click on the Edit button to edit these details.
View or edit the business details for the invoice
The business details will be shown in the Business Details section, and you may click Edit to change these details. The organization name, postal address, country, postal code, and primary contact email address may not be left blank.
Optionally, you add a Value Added Tax (VAT) identification number.
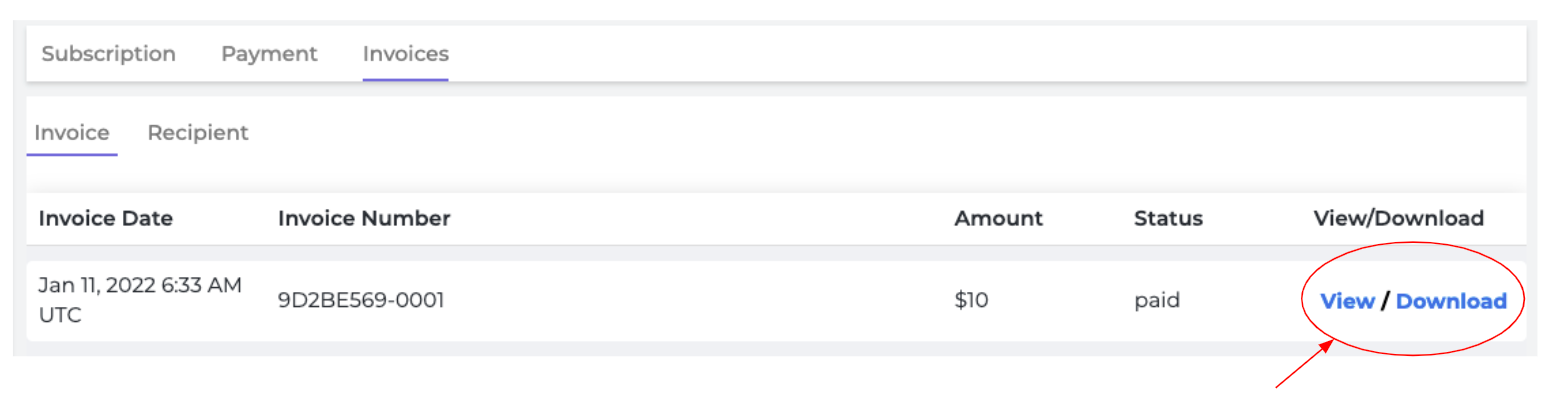
Invoices tab
The invoices sub tab has two secondary tabs - an Invoice tab and a Recipient tab. View invoice details, status, download invoices and receipts, and view and manage recipients.
View or download invoice details
To download a pdf copy of the invoice, click on the Download button for the desired invoice.
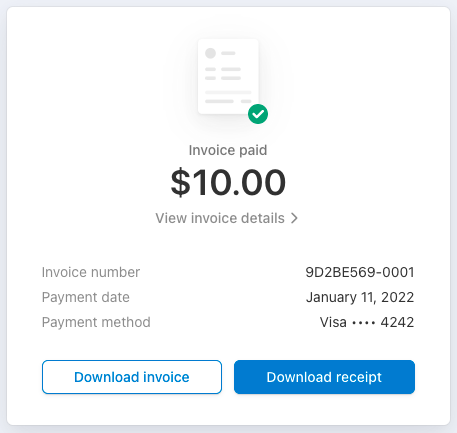
To view the details of the invoice, click on the View button for the desired invoice. From here you can click on View invoice details for a more detailed view. Additionally, you can click on Download invoice or Download receipt for a pdf copy.
View and download invoice receipts
For the desired invoice, click on the View button and then on the Download receipt in the following page to download a pdf copy.
View or add invoice recipients
Click on the Recipient secondary tab. Click on New Recipient to add another recipient of invoices. A first name, last name, and email address are required. You may edit these details in the future.
If there are no recipients listed, invoices are automatically sent to the Admin.
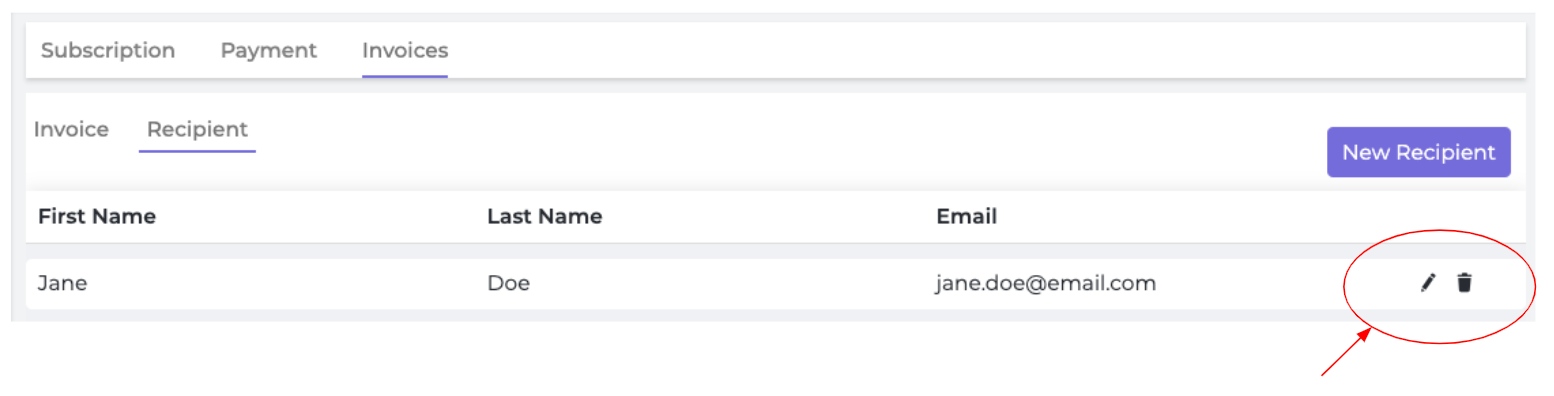
Edit details or delete an invoice recipient
Click on the Recipient secondary tab. To edit the details of a recipient, click on the edit button ![]() of the desired recipient. Update the necessary fields and click Update to finalize your changes.
of the desired recipient. Update the necessary fields and click Update to finalize your changes.
To remove or delete a recipient, click on the delete icon ![]() of the desired recipient and click Yes to confirm.
of the desired recipient and click Yes to confirm.
Comments
Please sign in to leave a comment.