The Requirements feature allows you to create rich text documents (for capturing ideas, stories, motivations and other reference material) and manage them in one place with the formal requirements. Requirements and the text documents can be organized in a hierarchical manner, like the file/folder system on a computer.
This article focuses on navigating the requirements module. To understand the structure and organization of requirements, please see Requirements structure and organization. For a background and understanding of the requirement lifecycle and review process, please see the following topics:
Requirements Explained (Definition, Lifecycle, States)
Steps for sending a requirement for review
Role as a requirement reviewer
PERMISSIONS: Users will need permissions to the requirements module to utilize the features in this article. Depending on the settings of a user's project permissions, they may be able to see all requirements and project members, or a subset of both. Additionally, the accessible entities that may be linked to requirements (such as bugs, tasks, test cases) will also depend on the users permissions in those respective modules. The content a user can view and edit may vary between project members. Project owners manage the permissions of project members. You may view your permissions by going to the Members tab nested under the project's primary Info tab, and then clicking on the vertical menu ![]() for your name and click View my permissions.
for your name and click View my permissions.
Requirements Help Highlights
Create a Requirement, Text Document, Folder
Requirement Module Secondary Tabs
Within the requirements module are the three secondary tabs used to create and manage requirements, view analytics for coverage and traceability, and manage templates for your project.
- Manage Requirements - In this tab, you will be able to create and manage your project requirements, documents, and folders. There are two views available:
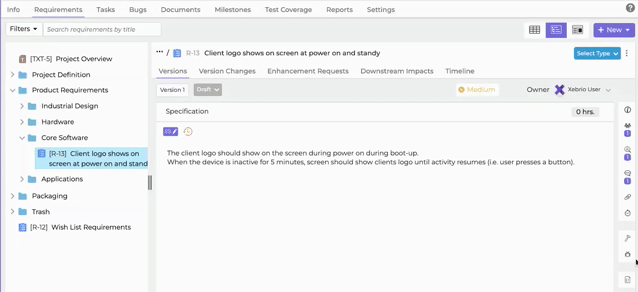
![]() Tree View - Allows you to organize and view requirements, documents (such as user stories) and folders as appropriate for your project. This view will be the primary reference view for this article.
Tree View - Allows you to organize and view requirements, documents (such as user stories) and folders as appropriate for your project. This view will be the primary reference view for this article.
![]() Page View - Displays only requirements in a flat list. To understand more about this view, skip down to Page View Details below.
Page View - Displays only requirements in a flat list. To understand more about this view, skip down to Page View Details below.
- View Analytics
Coverage View - This view shows coverage analysis of test cases and tasks associated with each requirement. To understand more about this view, skip down to Coverage View Details below.
Traceability - This view shows latest execution summary of the last final version of each requirement. To understand more about this view, skip down to Traceability View below.
Progress - This view shows progress of tasks and bugs for each requirement.
- Templates
Templates - Allows the reuse of a requirements description content. Templates can be viewed, edited, deleted, and imported. To learn more about text templates, please see Text Templates below.
Specification templates - Allows the hierarchy of the selected requirement, folder or text document to be reused. To learn more about specification templates, please see Specification Templates below.
Manage Requirements
In the Manage Requirements tab, you can create requirements, text documents and folder. Once created, you may use the tree view to arrange the items to best suite your team and project. To understand the structure and organization of requirements, please see Requirements structure and organization.
Create a Requirement
A requirement can be created from a blank start or from an existing text template.
-
Create a requirement from blank start - Navigate to the project's Requirements tab and then to the sub-tab labeled Manage Requirements. If this is the first requirement, click on New Requirement. If there are already existing requirements, find the New
 button in the top right corner and select
  Requirement from the dropdown.
Provide a title for the requirement, and click Save to create the requirement or click Save & New to save the current requirement and create another one.
Alternatively, you may right click on an entity in the tree view to create a new requirement which will be nested under the selected entity.
-
Start a requirement from a template - To use an existing template, click on the New button and select Requirement from the dropdown. In the pop-up, click Choose a Template and select the desired template from the list. A title must be provided for the requirement. Click Save to create the requirement, or click Save & New to save the current requirement and create another one right away.
There may be no templates saved yet, so a new one can be created. To learn more about these templates, please see Text Templates below.
You may also preview the template prior to creating the requirement by hitting the Preview button.
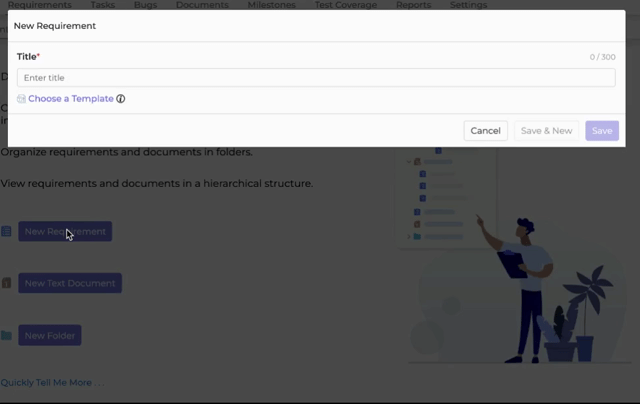
Create a Text Document
Click the New![]() button in the top right corner and select
button in the top right corner and select ![]() Text document from the dropdown. Add a title in the pop-up and click Save, or Save & New to save the current document and create another document right away. Alternatively, you may right click on an entity in the tree view to create a new text document which will be nested under the selected entity.
Text document from the dropdown. Add a title in the pop-up and click Save, or Save & New to save the current document and create another document right away. Alternatively, you may right click on an entity in the tree view to create a new text document which will be nested under the selected entity.
Create a Folder
In the Requirements tab, click the New![]() button in the top right corner and select
button in the top right corner and select ![]() Folder from the dropdown. Add a title in the pop-up and click Save, or Save & New to save the current folder and create another folder right away. Alternatively, you may right click on an entity in the tree view to create a new folder which will be nested under the selected entity.
Folder from the dropdown. Add a title in the pop-up and click Save, or Save & New to save the current folder and create another folder right away. Alternatively, you may right click on an entity in the tree view to create a new folder which will be nested under the selected entity.
Tree View Details
Requirement Details
Title
The requirement title is required when adding a new requirement. It may be edited after creation in the requirement details window. Hover the mouse over the current title until an edit icon ![]() appears. Click on it and edit the title. When complete, click the
appears. Click on it and edit the title. When complete, click the ![]() icon or press enter to save changes. To cancel edits, click the
icon or press enter to save changes. To cancel edits, click the ![]() or click outside the edit area.
or click outside the edit area.
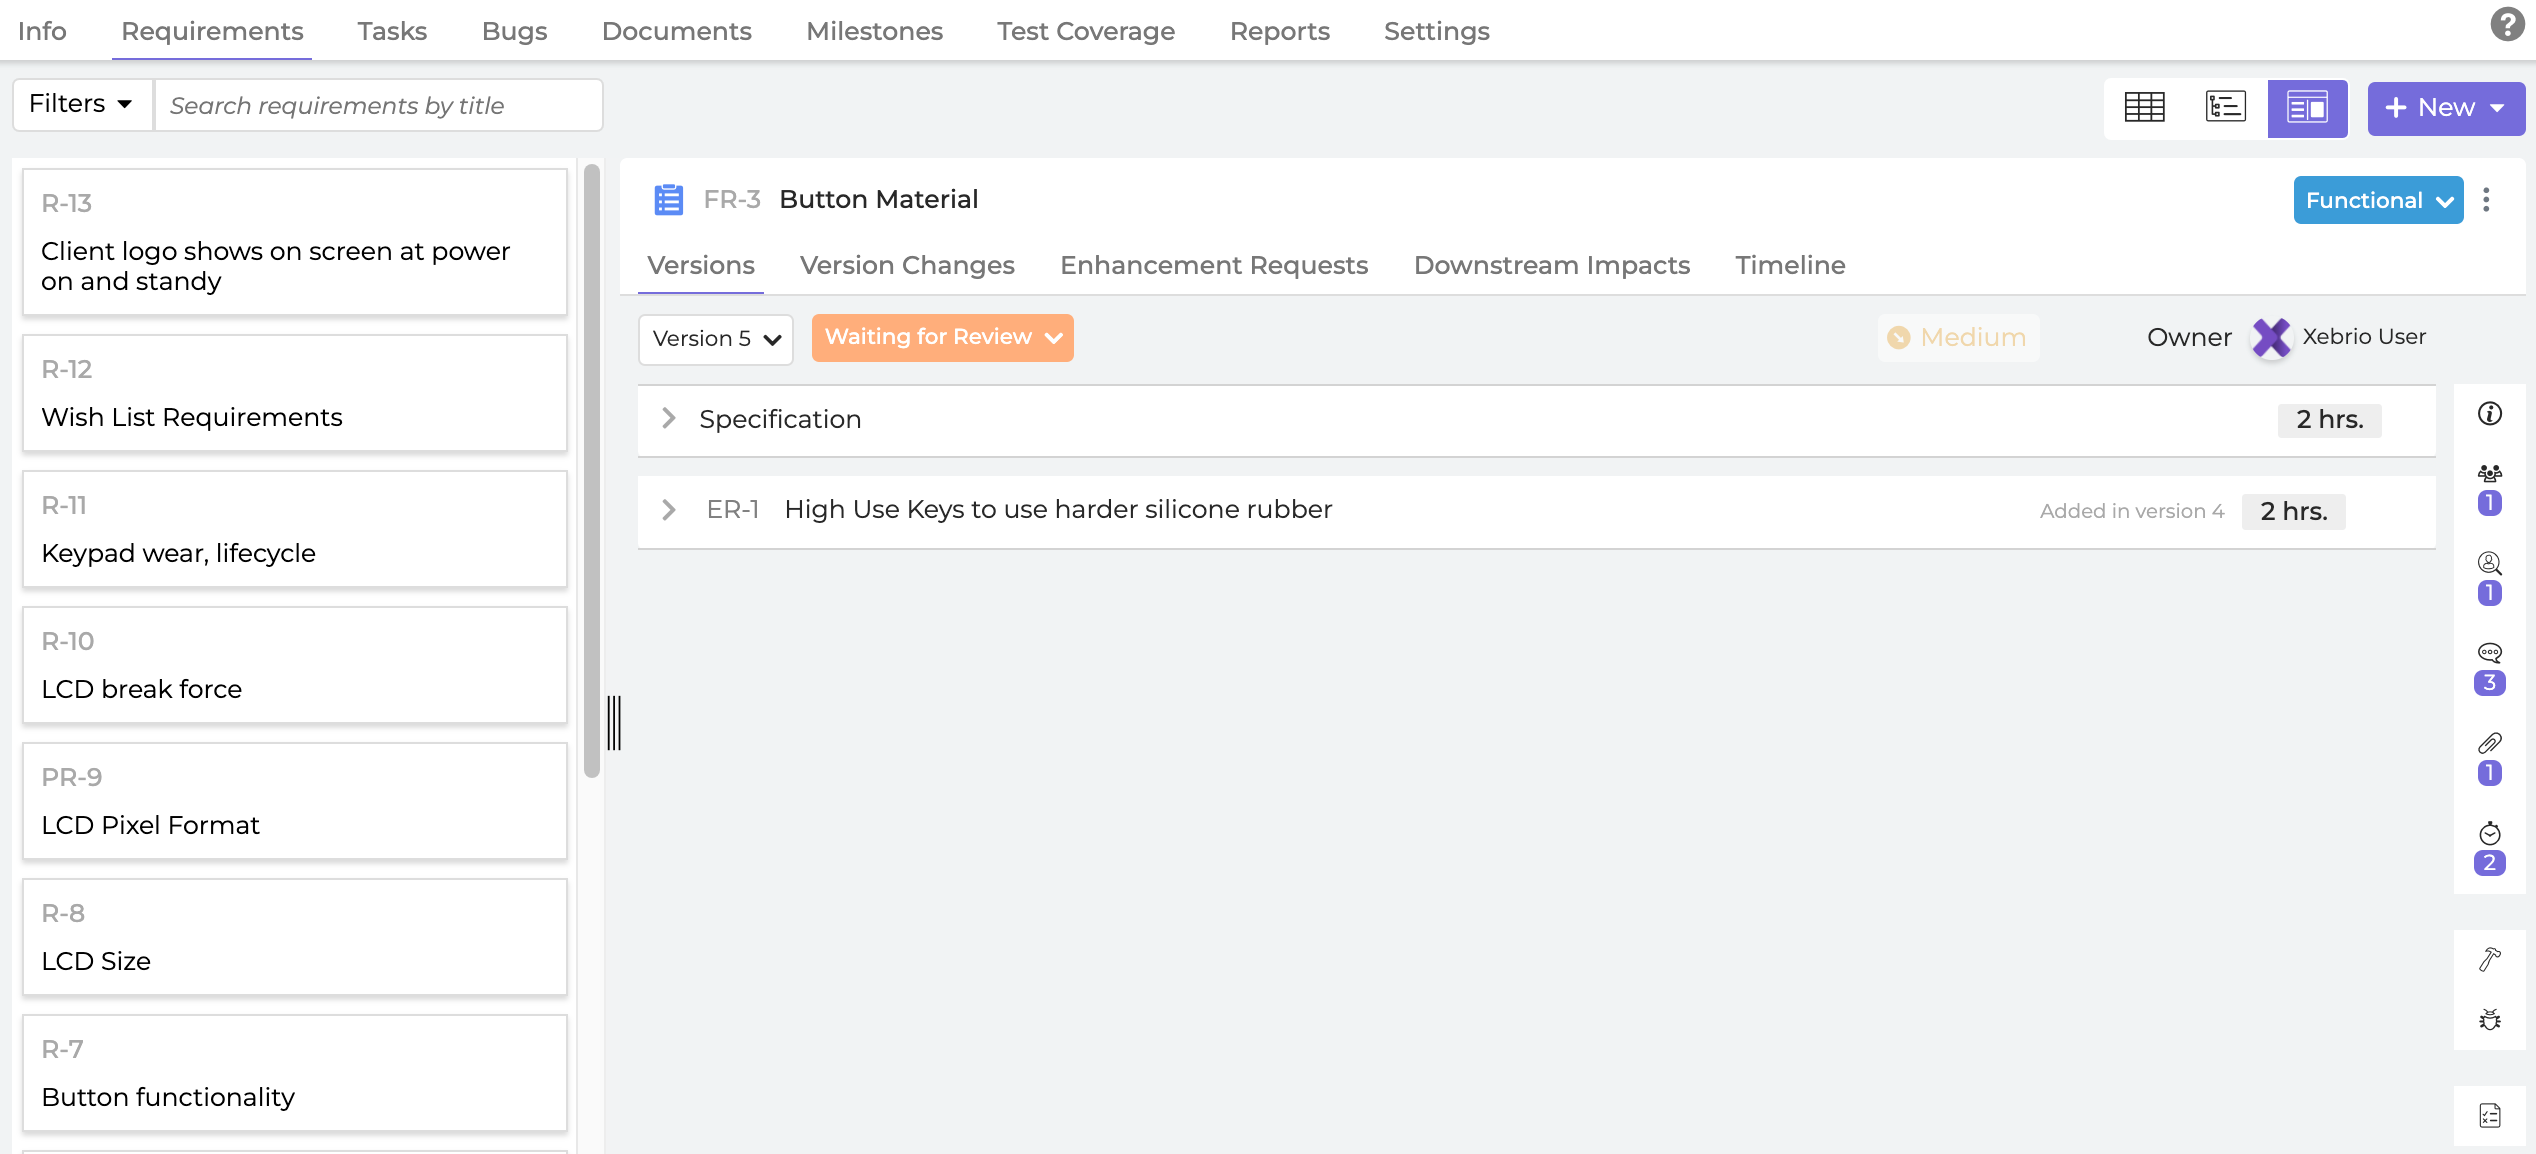
Number
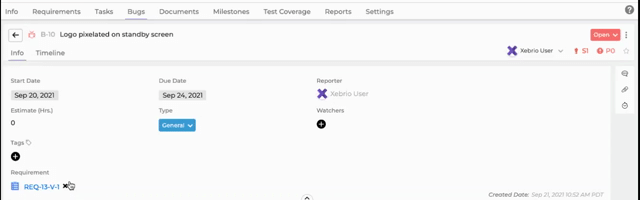
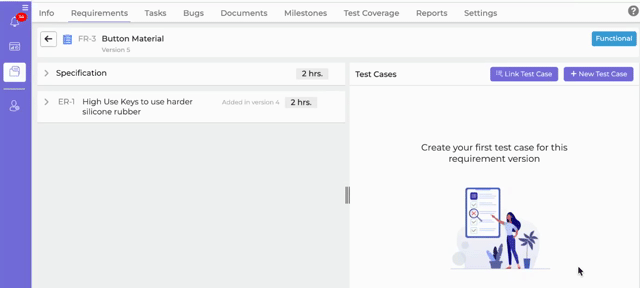
The requirement number is combination of the requirement type code and a designated number. For example, FR-3 is a Functional Requirement and the 3rd requirement created.
Type
You may categorize requirements using the dropdown menu in the requirement details window. A project owner and those with access to configure project settings may also create new requirement types in the project Settings tab.
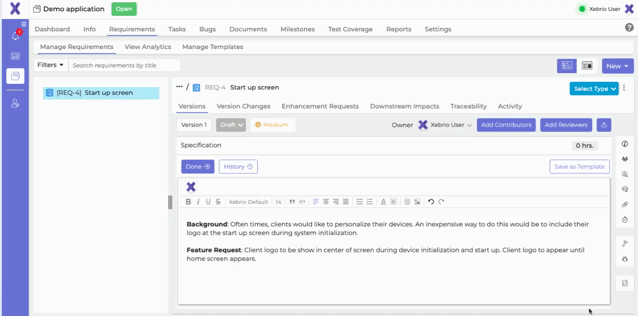
Description
Click Edit ![]() at the top of the description area. Changes can be made in real time by multiple contributors at the same time, and the changes are auto-saved. Click Done
at the top of the description area. Changes can be made in real time by multiple contributors at the same time, and the changes are auto-saved. Click Done ![]() to exit collaborative editing. Note that adding and updating specifications is allowed only when the requirement is in Draft status.
to exit collaborative editing. Note that adding and updating specifications is allowed only when the requirement is in Draft status.
Project owners and those added as a contributor can collaborate on a specification.
Note that the Edit button will be disabled if the version status is Final.
Priority
The requirement may be given a priority, with choices being High, Medium, and Low. Click on the current priority to select a priority from the dropdown menu. Priority may only be changed when the requirement version is in draft status.
View history
To view the history of changes made to the specification, click on the History ![]() button in the description area. Use the scroll bar on the bottom of the History view to see changes over time, including the user who made the changes and when they made the changes. Text highlighted in red indicates a removal of the text, while text highlighted in green indicates the addition of that text into the description. Click History
button in the description area. Use the scroll bar on the bottom of the History view to see changes over time, including the user who made the changes and when they made the changes. Text highlighted in red indicates a removal of the text, while text highlighted in green indicates the addition of that text into the description. Click History ![]() to exit the history view.
to exit the history view.
Estimate Time
To edit the time estimate for the version, hover your mouse over the current estimate until an edit icon![]() appears. Click on it to edit the estimate, and use the up
appears. Click on it to edit the estimate, and use the up ![]() and down
and down ![]() arrows or enter the value in the field. Click
arrows or enter the value in the field. Click ![]() to save the changes, or click
to save the changes, or click![]() to cancel the changes.
to cancel the changes.
Group Actions
The group action feature allows a particular action to be performed on a group of selected requirements. The actions provided under the group action feature are:
- Send for Review
- Add Contributors
- Add Reviewers
- Mark as Final
- Add Co-Owners
- Add Tags
To learn more about group actions, please see Group actions in detail.
Horizontal Menu
Versions
When a requirement is created, it has a version number of 1. When a new version is derived, the version number is incremented by 1. You can view the details of each version by clicking on the version dropdown next to status and choosing the desired version to view. There will be no dropdown if there is only one version available.
To modify a requirement after it is in Final status, a new version of that requirement must be derived.
This tab will have an additional vertical panel on the right side. The details for this are further down in this article.
Version Changes
If there are more than one version of a requirement, you may view the changes made between two versions in the Version Changes tab. The changes also include any Enhancement Requests included between selected versions. Choose the versions in the From and To drop boxes. Use the horizontal timeline scroll toll to see the changes. The context highlighted in green is what was added, while those highlighted in red are what was removed.
Version Traceability
The traceability tab will show the forward traceability of requirements to test cases. It allows for an easy view of the following:
- Builds the selected requirement has been included for testing
- Test cases which are linked to the selected requirement version and executed in test sessions at least once
- Bugs raised against executed test cases linked to the requirement version
Enhancement Requests
Enhancement requests (ERs) are requests or recommendations for a product enhancement or modifications. In this tab, you will be able to view all the ERs for a requirement, and which versions for which they are added.
The vertical menu icon![]() , when clicked, will have the option to delete the ER if it is not added to an requirement version. To read in more detail about enhancement requests, please read Enhancement requests in detail.
, when clicked, will have the option to delete the ER if it is not added to an requirement version. To read in more detail about enhancement requests, please read Enhancement requests in detail.
Upstream / Downstream
If a requirement is specified as a downstream of another, and the latter (upstream) is edited, it implies that the former (downstream) may be impacted. In this tab, you can add and view the current upstream and downstream impacts.
Dependencies
The dependencies tab will show the mapping of the current upstream and downstream dependencies.
Activity
The activity tab will show details on the activity and changes for the requirement, which user was involved, and the date/time they occurred. There will be a Load More button at the end of the list if there are older details available for view.
Version Vertical Menu
Items in this menu are specific to the version.
 Info
Info
You will be able to view the estimate hours in fulfilling this version and any included ERs, the date the version was created. You can also include Tags in this tab by clicking on the ![]() and choosing from the available tags or create a new one.
and choosing from the available tags or create a new one.
Note that the estimated hours shown in the Info tab are the sum of those indicated under the description and any added ERs, so to change the estimated hours in the Info tab, the changes must be done in the Specification and/or ERs.
 Contributors
The contributors tab will allow you to view contributors to the specification version. Contributors are allowed to make edits to the requirement description. Click the contributors icon ![]() to expand the panel and see the list of contributor names. A numbered box below the icon indicates the number of contributors added, if any.
to expand the panel and see the list of contributor names. A numbered box below the icon indicates the number of contributors added, if any.
To add contributors to the version, click the ![]() button to view the list of available project member's to add. In the pop-up, click on the project members name and click Add to finalize. If the version is in Final status, there will not be a
button to view the list of available project member's to add. In the pop-up, click on the project members name and click Add to finalize. If the version is in Final status, there will not be a ![]() button available to add contributors.
button available to add contributors.
To remove contributors from the version, click the ![]() next to the contributor's name to remove them.
next to the contributor's name to remove them.
 Reviewers
The reviewers tab will allow you to view reviewers to the requirement version. Click the reviewers icon ![]() to expand the panel and see the list of reviewer names. A numbered box below the icon indicates the number of reviewers added, if any.
to expand the panel and see the list of reviewer names. A numbered box below the icon indicates the number of reviewers added, if any.
To learn more about the review process and reviewer roles, please see Requirement Review Process and Role as a requirement reviewer
To add reviewers to the version, click the ![]() button to view the list of available project members to add. In the pop-up, click on the project members name and click Add to finalize. If the version is in Final status, there will not be a
button to view the list of available project members to add. In the pop-up, click on the project members name and click Add to finalize. If the version is in Final status, there will not be a ![]() button available to add reviewers.
button available to add reviewers.
To remove reviewers from the version, click the ![]() next to the reviewer name to remove them.
next to the reviewer name to remove them.
 Co-Owners
In the requirement version's right side vertical panel, click on the co-owners icon to view all the co-owners of the requirement version. These users are able to edit the details of a requirement version just like the current requirement version owner. A numbered box below the icon indicates the number of co-owners, if any.
To add co-owners to the version, click the ![]() button to view the list of available project members to add. In the pop-up, click on the project members name and click Add to finalize. If the version is in Final status, there will not be a
button to view the list of available project members to add. In the pop-up, click on the project members name and click Add to finalize. If the version is in Final status, there will not be a ![]() button available to add reviewers.
button available to add reviewers.
To remove co-owners from the version, click the ![]() next to the reviewer name to remove them.
next to the reviewer name to remove them.
 Comments
In the requirement version's right side vertical panel, click on the comments icon ![]() to view all the comments made.
to view all the comments made.
A numbered box below the icon indicates the number of comments added, if any.
 Attachments
To help with collaboration and allow resources and data to be more accessible, files can be attached within requirements. Attachments can be added to a version using the ![]() attachments section on the right side vertical menu. Once attached, each attachment will have a vertical menu
attachments section on the right side vertical menu. Once attached, each attachment will have a vertical menu![]() for which you can click to either download or delete the attachment.
for which you can click to either download or delete the attachment.
A numbered box below the icon specifies the number of attachments, if any.
 Time Entries
Team members can keep track of the time spent on each requirement version. To do this or to view entries, click ![]() in the vertical menu. Click
in the vertical menu. Click ![]() to add entries. In the pop up, enter the time and a short description of the work being done.
to add entries. In the pop up, enter the time and a short description of the work being done.
Time entries cannot be recorded for future dates nor dates prior to the project start date. Entries must be at least 5 minutes. Time entries can be edited after creation, but cannot be deleted.
A numbered box below the icon specifies the number of time entries made, if any.
 Tasks
Tasks
You may view and link a task to a requirement version. Click on the tasks icon ![]() on the right vertical menu. There are options to link already existing tasks, create a new task or export tasks. For a deeper look into tasks, see Tasks in Detail.
on the right vertical menu. There are options to link already existing tasks, create a new task or export tasks. For a deeper look into tasks, see Tasks in Detail.
Click New/Link then choose to either create new task or link an existing Xebrio or Jira task. For new tasks, add a title and click Save. That new task can be edited by clicking on the task ID to open up the task details window.
If choosing to link existing Xebrio tasks, in the pop up, select the desired tasks to link from the left column so that they appear on the right column. When you click Add, all the selected tasks in the right column will be linked to the requirement.
If linking a Jira task, you may be prompted to first log in. Once logged in, select the appropriate Jira project and then select the tasks to link.
Unlink/Remove a Task- To unlink a task from the requirement version's task tab ![]() , click on the vertical menu
, click on the vertical menu ![]() for the desired task and choose
for the desired task and choose Remove.
Alternately, you may remove a task from the task's details window by clicking the ![]() when you hover your mouse over the requirement, which is listed in the Requirements section.
when you hover your mouse over the requirement, which is listed in the Requirements section.
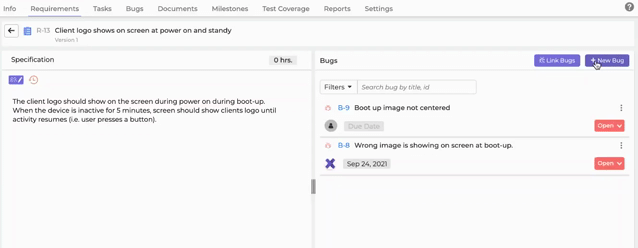
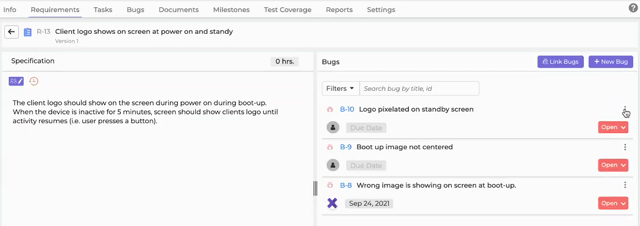
 Bugs
Bugs
You may view and link a bug to a requirement version. Click on the bugs icon ![]() on the right vertical menu. There are options to link an already existing bug or create a new bug. For a deeper look into bugs, see Bugs in Details.
on the right vertical menu. There are options to link an already existing bug or create a new bug. For a deeper look into bugs, see Bugs in Details.
Link an Existing Bug - To link an existing bug, click ![]() Link Bugs then click on the desired bugs to link. The bugs that will be linked will appear on the right side of the pop-up. Click on Add to link them to the requirement version.
Link Bugs then click on the desired bugs to link. The bugs that will be linked will appear on the right side of the pop-up. Click on Add to link them to the requirement version.
Add a New Bug - You can also create a new bug and have it automatically linked to the version by clicking New Bug. Add a title and click Save. To edit the details of the bug, click on the bug ID to open the bug details.
Unlink/Remove a Bug - To unlink a bug from the requirement version, click on the vertical menu ![]() for the desired bug and choose Remove.
for the desired bug and choose Remove.
Alternately, you may remove a bug from the bug's details window by clicking the ![]() when you hover your mouse over the requirement, which is listed in the Requirements section.
when you hover your mouse over the requirement, which is listed in the Requirements section.
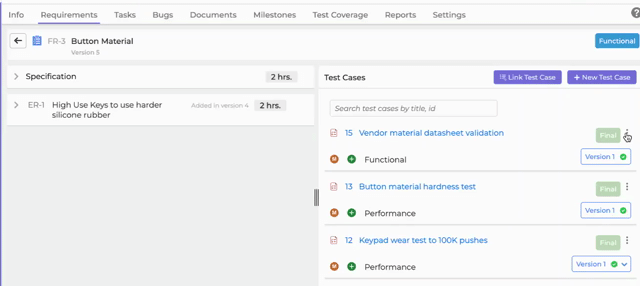
 Test Cases
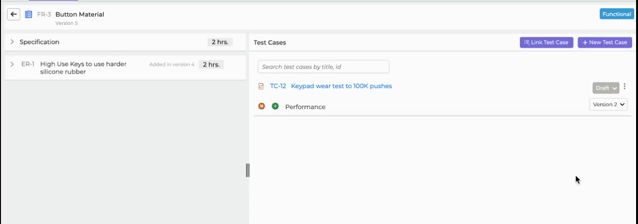
You may view and link test cases to a requirement version. Click on the test cases icon ![]() on the right vertical menu. There are options to link an already existing test case or create a new test case. For a deeper look into test cases, see Test Cases in Detail.
on the right vertical menu. There are options to link an already existing test case or create a new test case. For a deeper look into test cases, see Test Cases in Detail.
Link an Existing Test Cases - To link an existing test case, click ![]() Link Test Case, then click on the desired test cases to link. The test cases that will be linked will appear on the right side of the pop-up. Also note that if there are multiple versions of a test case, you may choose the version from the drop down menu. The green
Link Test Case, then click on the desired test cases to link. The test cases that will be linked will appear on the right side of the pop-up. Also note that if there are multiple versions of a test case, you may choose the version from the drop down menu. The green ![]() next to a version indicates the current version. Click on Add to link them to the requirement version..
next to a version indicates the current version. Click on Add to link them to the requirement version..
Add New Test Case - You can also create a new test case and have it automatically linked to the version by clicking New Test Case. Add a title and click Save. To edit the details of the test case, click on the test case title to open the test case details.
Change test case status and version - From the requirement version's test case tab, you may change the status of a test case from Draft to Final by clicking on the status drop down. You will not be able to change from Final to Draft, but may derive a new version of the test case. This can be done in the test case details window. Simply click on the test case to open up the details.
You may also change the test case version if there are more than one. Click on the current version to expand the pop up, and choose the desired version. The green ![]() next to a version indicates the current version.
next to a version indicates the current version.
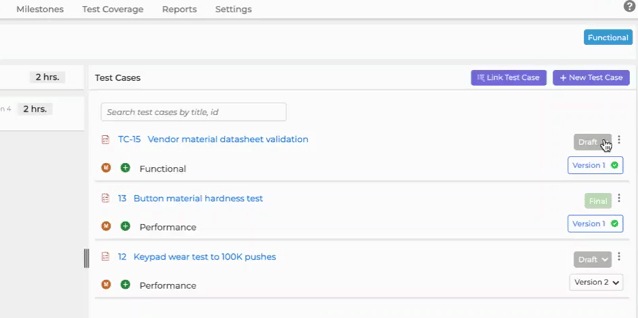
Remove a test case - To unlink or remove a test case from the requirement version, click on the vertical menu ![]() for the desired test case and choose Remove.
for the desired test case and choose Remove.
View Analytics
Requirement Analytics, using the  icon, displays the breakdown of requirements to trace items across the development lifecycle. This view allows you to view the information you need quickly, rather than checking each requirement separately. This traceability matrix involves both backward and forward traceability so we can ensure that the test cases are appropriately and correctly mapped correctly to requirements and test cases.
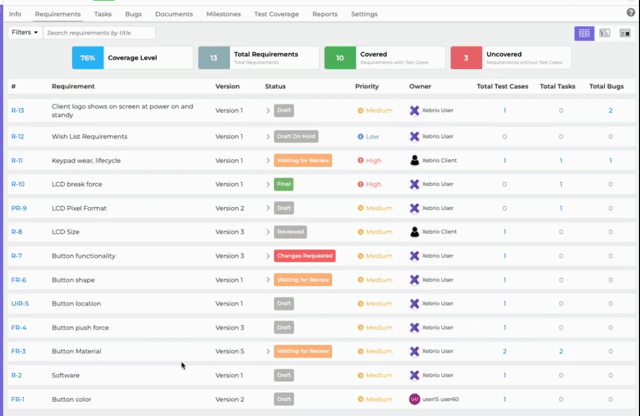
Coverage View
In this view, you will be able to see a list of the requirement, version, status, priority, owner, reviewers, and number of associated test cases and tasks.
It will also outline your coverage level based on your total requirements and the percentage of those covered with a test case.
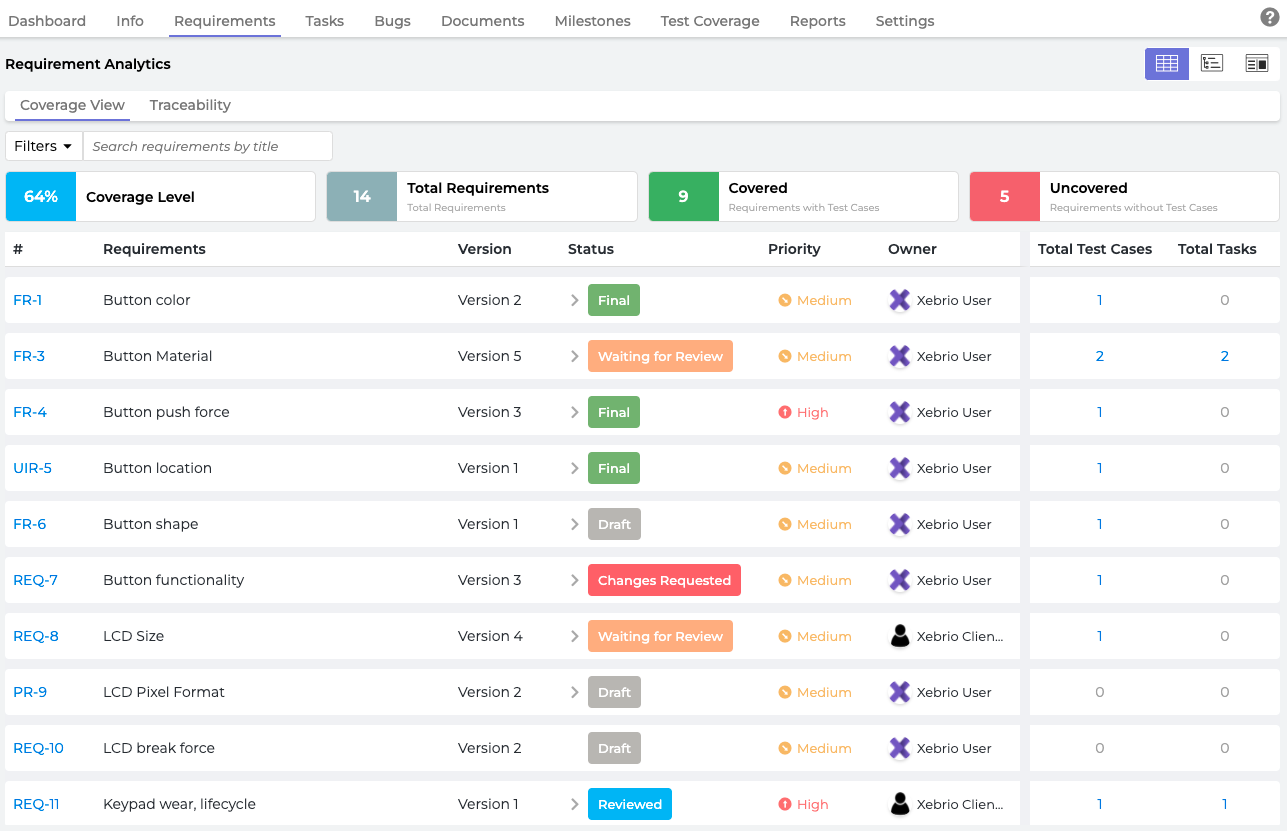
With coverage view, you can easily see the status of a requirement approval. If reviewers are associated to a requirement or if the requirement is in Final status, there will be a ![]() next to the requirement status. Click it to expand the list of reviewers and current status.
next to the requirement status. Click it to expand the list of reviewers and current status.
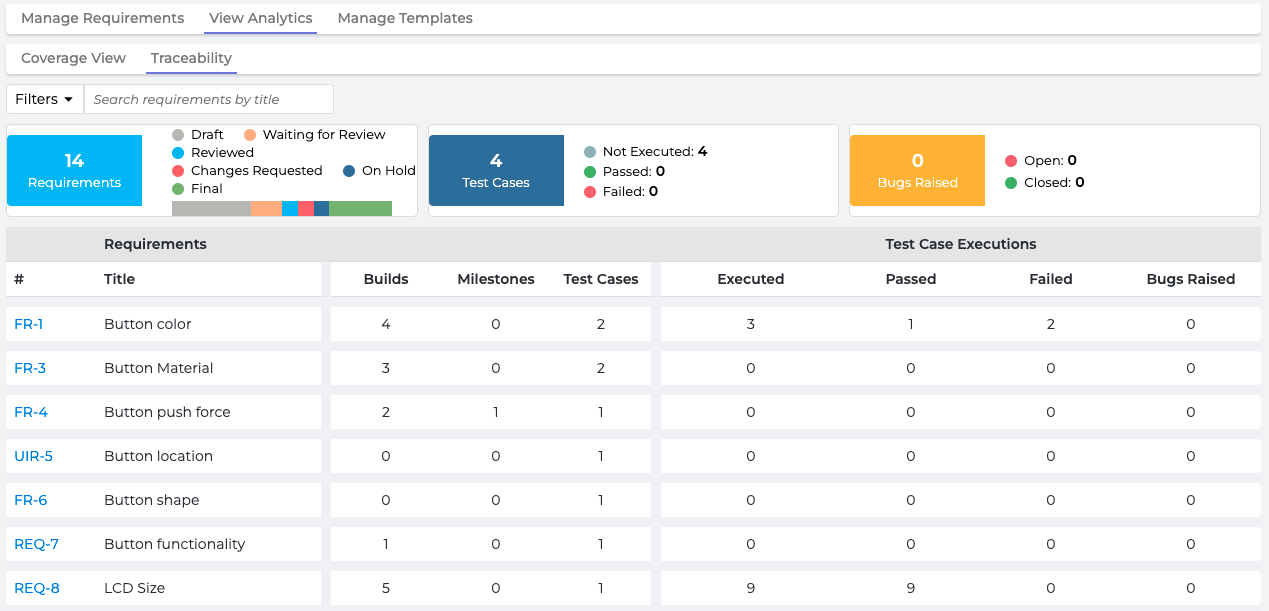
Traceability View
This view shows the breakdown of requirements with details on their builds and test cases, which have not been executed, passed, failed, and the bugs raised from failed test cases in their associated builds.
Page View Details
The page view shows requirements in a list which allows users to click through them quickly and see the details window for each.
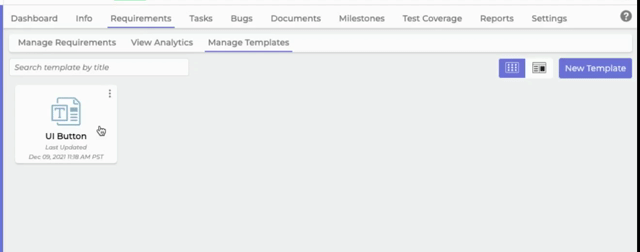
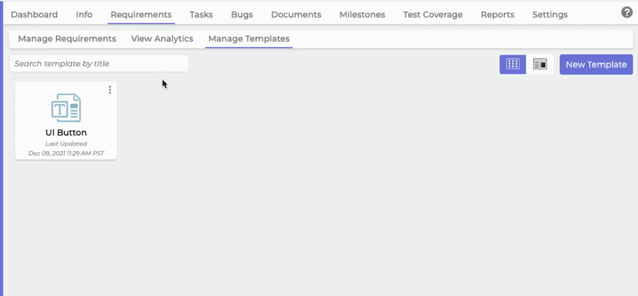
Templates
Views
There are two views available in the templates tab, List view ![]() or Page View
or Page View ![]() . Page view will allow you to easily scroll through and preview the available templates.
. Page view will allow you to easily scroll through and preview the available templates.
List View
Page View
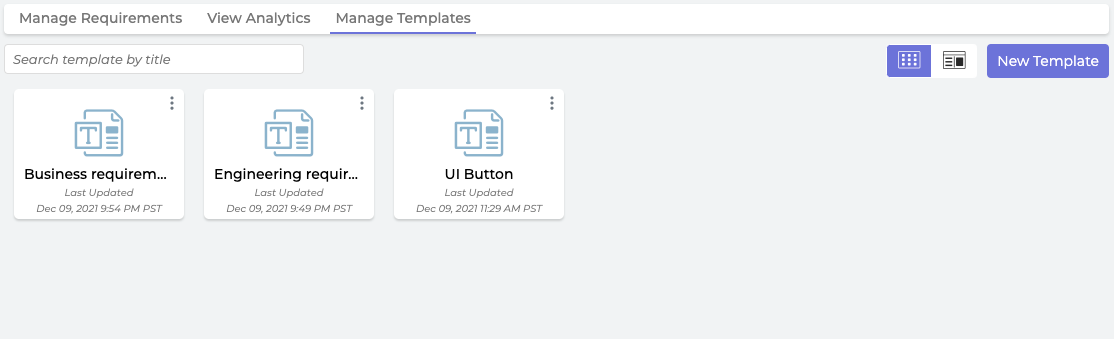
Text Templates
Requirement text templates can be managed by navigating to the Requirements tab, and then to the Text Templates sub-tab. Templates can be viewed, edited, and deleted.
When templates are created and saved, they are made available system wide so they can be used in other projects as well. In other words, the Text Templates tabs of all system projects will have the same templates.
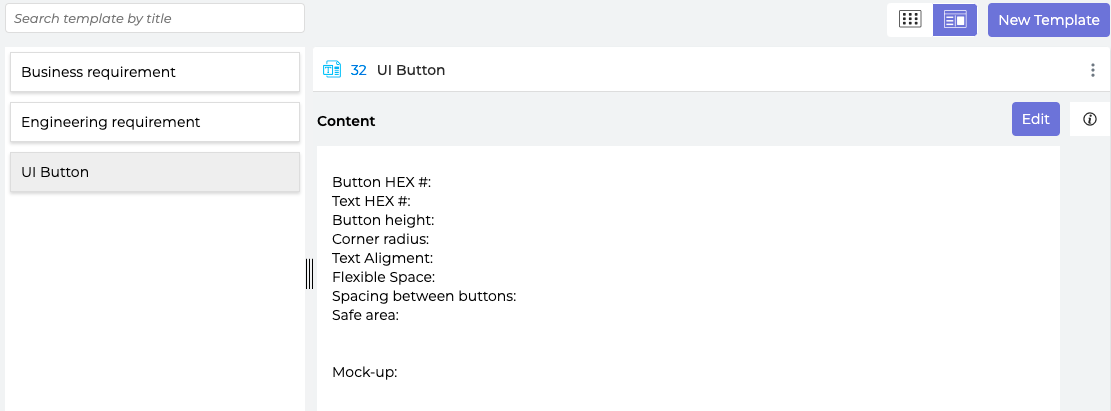
Note that when saving text templates for a requirement, only the content in the description is saved (including tables and images). Other related requirement attributes do not get saved in the template (i.e. owner, contributors, reviewers, comments, estimates, etc).
Creating a text template
In the Text Templates sub-tab, click on New Template. Enter a title, provide content for the template, and click Save to create the template.

A template can also be made from a Requirement. In the requirement details box, click Save as Template. This will create a template for which you will need to provide a title. Click Save to create the template.
Edit a template
Double click on the template to open up the details. Click on the Edit button and then click Save to finalize changes.
Delete
A template can be deleted by clicking on the vertical menu ![]() of the template and choosing
of the template and choosing ![]() Delete.
Delete.
Info
To view the details of a template, such as who and when created and updated the template, click on the template's ![]() info icon.
info icon.

Export requirement text templates
Text templates can be exported so that they can be imported into other projects. To export a requirement text template, navigate to the Text Templates secondary tab under the Requirements primary tab. Click on the vertical menu ![]() for the specific template, and choose
for the specific template, and choose ![]() Export. Xebrio will create a zip file which can be imported by Xebrio into another project.
Export. Xebrio will create a zip file which can be imported by Xebrio into another project.
Specification Templates
Specification templates allow the hierarchy of the selected requirement, folder or text document to be reused. The hierarchy is reusable within the same project or it can be imported as a specification in another project. Note that upstream and downstream dependencies are not saved with the template.
To view the available specification templates, navigate to the Specification Templates secondary tab in the Requirements primary tab.
Saving a specification template
In the tree view, right click on the desired requirement, folder, or text document. Select Specification Template, and then Save As... in the dropdown. Enter in a title, an optional description, and click Save. This will save the hierarchy structure in the Specification Templates tab. Note that upstream and downstream dependencies are not saved with the template.
Importing a specification template
To import a specification template, a template must have been previously saved and available in the Specification Templates secondary tab of the Requirements primary tab.
To import a specification template into the requirement tree view, right click on the requirement, folder or text document you would like the hierarchy in the template to fall under. Select Specification Template, and then Import in the dropdown. Hover over the desired template until a Select button appears and then click it. Click on the Import button to import the template into the requirement tree. Before selecting, you may also click on the template to preview it.
Delete a specification template
A specification template may be deleted from the Specification Templates secondary tab in the Requirements primary tab. Once deleted, the template will be deleted permanently. Click on the vertical menu for the desired template, and select Delete.
Test Execution Report
A Test Execution Report can be created for a requirement, its associated test cases, and the summary of the latest test executions. A user must have public view access in both the Requirements and Test Coverage modules to perform this action.
The test execution report can be generated from the requirement Tree View ![]() . Right click on the requirement, and select Test Execution Report from the menu. The report will generate in another tab and, once complete, a Print button will be available to print a copy or save a pdf.
. Right click on the requirement, and select Test Execution Report from the menu. The report will generate in another tab and, once complete, a Print button will be available to print a copy or save a pdf.
A test execution report can be generated for one requirement, or multiple requirements if the parent entity/container is selected in the requirement tree view.
Export as Document
To export the whole requirement tree hierarchy into a single document view, click on the Export As Document button.
To export a portion of the hierarchy or just one object, right click on the item in the tree view and select Export As Document. This will generate a document view for that item and its subitems.
Comments
Please sign in to leave a comment.